Showing posts with label recipe. Show all posts

Tuesday, August 25, 2015

Starting solid for baby and beyond 宝宝辅食王中王


This book (300 pages) is a must-have for parents weaning baby and starting solids for the first time. It's loaded with simple, practical recipes and advice, including recipes to boost appetite 开胃、strengthen teeth 保护牙齿、allergy 过敏、vomiting 呕吐、diarrhoea腹泻、constipation 便秘、heatiness 上火 and more。The recipes carry you through each stage of solid introduction, from 4 month onwards up till 12 months,from purees and grains to finger foods. It also includes tons of tips and helpful hints on what babies should eat and shouldn't and the reason why.You'll learn how to put together ingredients, how to allow your baby to explore new tastes and textures and how to deal with feeding problems. 

Price RM36 (not including postage)

Saturday, October 19, 2013

Egg florentine on pizza

It's breakfast on pizza!!

I had half a batch of pizza dough left in the fridge after baking my first pizza, I gladly make another two mini pizza for breakfast this morning, cos it's Sunday tomorrow and we always eat out with the in-laws for morning breakfast and dinner. As Ree Drummond mentioned (I used her recipe for the pizza base), the base's taste and texture will improve if left in the fridge for a few days. This has been left in the fridge for about 2 days. It was really better than the first attempt. However, I always had to leave it to proof in a warm-ish area for about 30min after taking it out of the fridge. It never really rose or enlarged its size when left in the fridge.
 
This time, I made two mini round pizza, one for me and another one for mom. They were so good, we finished eating one each, and left none for my hubby who was still sleeping. Oppsss.. I decided I shall not post these photos onto facebook, in case he wonders where his is.


I asked mom if she liked her pizza yesterday. She said yes, but would be good with more vege. So I topped up hers (first photo) with more roasted vege. Everything else were the same.
 
Whereas for mine (second photo) - Egg Florentine pizza, I didn't use a tomato puree/ sauce for the base, I used pesto sauce instead. I have an unfinished jar of pesto sauce I bought from Italy few years ago (still tastes and smells okay ;p), so I just spread it over the base and topped up with the same topping, roasted vege and sprinkled with generous amount of cheese, and into the oven they went.
 
After being baked in the oven for 5min (total baking time was 10min), I cracked an egg over mine, and let it baked for another 5min. It came out with the yolk still wobbly soft, just the way I like it :) I had a sore throat gradually developing from the day before, but I still find this so appetizing and finished it in no time.

Simple strawberry swirl cheesecake cups (Wendy's birthday)

This is a seriously simple one. They are made for another dear friend, Wendy's, birthday. I have tried baking complicated cakes for birthday and I always end up making silly mistakes and last minute messes. So this time, I decided I will make this simple, fuss-free, almost fail-proof cheesecake cups.
 
I got so laid-back, that I didn't even want to go through the hassle of making the base for the cheesecake cups. I just place one oreo cookie at the bottom, pour in the cream cheese batter and bake. But I did make the effort of creating these beautiful swirls using some syrups I whipped up using strawberries and blackberries.  


Taking a sneak peep at the cheesecakes


Mom kindly entertained and cared for Josh when I made these.

Recipe (modified from here)
Makes 7 cupcakes in square liners

For the crust: 7 Oreo cookies

For the strawberry and blackberry swirl
  • Handful of strawberry and/or blackberry (I used frozen ones)
  • 1tbsp icing sugar
Heat up all ingredients in a pan until the berries turn soft and the sugar has melted. Pass the mixture through a fine mesh to obtain the syrup.

For the cheesecake
  • 250g cream cheese, at room temperature, cut into small cubes
  • 200g sugar**
  • Pinch of salt
  • 1 tsp vanilla extract
  • 1 large eggs, at room temperature
Preheat the oven to 160deg C (fan forced).
 
Beat the cream cheese on medium-high speed in the bowl of an electric mixer until fluffy.  Blend in the sugar until smooth.  Mix in salt and vanilla.  Beat in the egg, mixing well.
 
Place one oreo cookie on each cupcake liner. Then put in about 2-3tbsp of the cheesecake batter over the oreo cookie. Make 3 dots of strawberry/blackberry syrup over the cheesecake batter. Use a toothpick to lightly swirl and create the marbled effect.
 
*Take note that the cheesecake will puff up to create a beautiful dome when in the oven and will sink slightly after cooled.
**I have already greatly reduced the amount of sugar, I still felt that it turned out sweet. But I had good reviews over them, even my friends who are constantly on a diet, they finished eating them. So I guessed they liked them.
 
This is another simple keeper recipe for cheesecakes. But I may reduce the sugar to 150g in future. If you don't have any berries at home, you may create the swirl using melted chocolate.

Friday, October 18, 2013

Roasted vege pizza

I've been craving for a good homemade pizza for sometime. I don't wanna get them from pizza hut cos they have thick and doughy crust, I wanted something thin, with lots of vege and lots of cheese. I knew I had to make my own.
 
Mom and I had lots of pizza during our last trip to Italy. Mosf of them were just plain pizza with lots of cheese and nothing much else (how the Italians love theirs). I don't mind the generous serving of cheese, but I would love it more with more toppings.
 
Mom just got back to Sandakan and I come across this easy pizza base recipe by Ree Drummond, so I prepped this up the night before to bake as breakfast the next morning. Ree suggested to rest the dough in the fridge for a few days before making the pizza. I didn't have the time. I only rested it from 9pm to 6am (about 9 hours) in fridge and took it out and left at room temperature for about 30min prior to making the base, and it tasted okay. I had half of the dough left after making this one, so that can rest for longer and I get to try the difference.
 
I only used her recipe for the dough, and I went free-style for the topping. I knew what I wanted. Lots of vege (especially those vege that I can't finish and are still lying in the fridge) and lots of cheese.

Before baking: topped up with generous serving of veg.

Before baking: topped with generous amount of grated cheddar and sliced olives

Fresh out of the oven


Pizza and coffee for breakfast, delizioso!

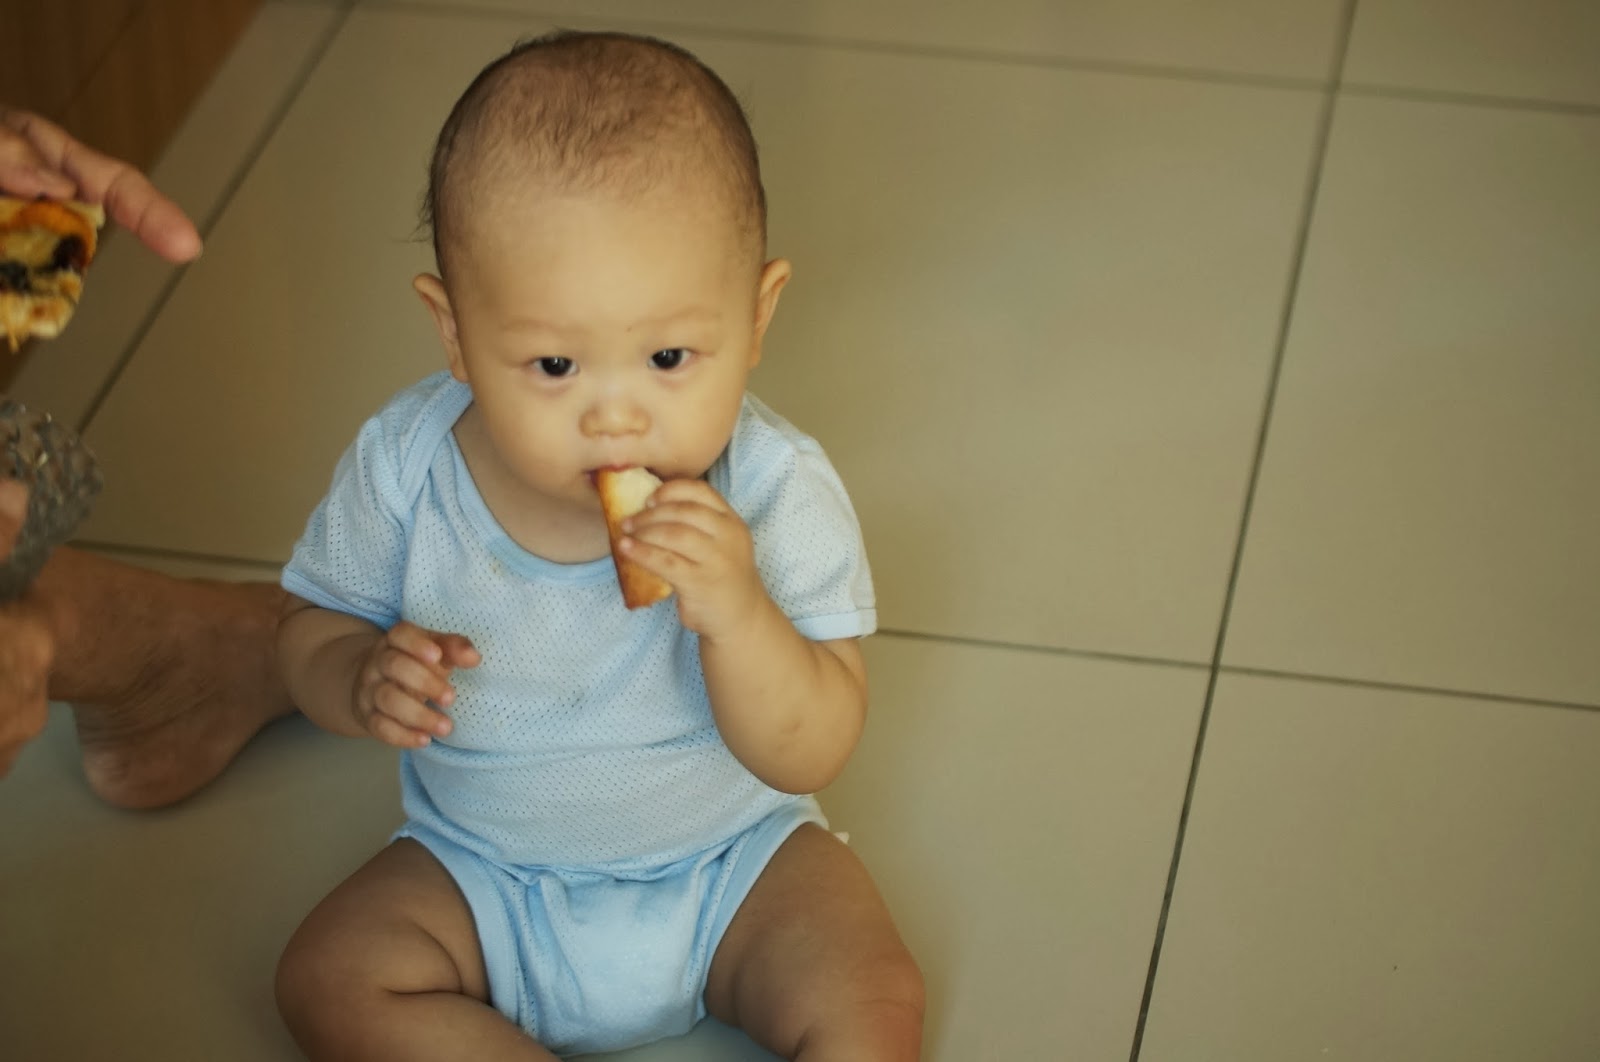
Lil' fella enjoyed the pizza crust too.
Recipe
Adapted from Ree Drummond's Favorite Pizza
 
For the crust (makes two thin crust, rectangle shape about 15cmx20cm)
  • 1/2 tsp dried instant yeast, sprinkled over 3/4 cup warm water.
  • 2 cups all purpose flour
  • 3tbsp extra virgin olive oil
  • 1/2 tsp salt

To make the crust
 
Sprinkle yeast over 3/4 cup warm (not lukewarm) water.
In a mixer (I used my breadmaker), combine flour and salt. With the mixer running on low speed (with paddle attachment), drizzle in olive oil until combined with flour. Next, pour in yeast/water mixture and mix until just combined.
 
Coat a separate mixing bowl with a light drizzle of olive oil, and form the dough into a ball. Toss to coat dough in olive oil, then cover the bowl tightly with plastic wrap and store in the fridge until you need it. ***It's best to make the dough at least 24 hours in advance, and 3 or 4 days is even better.
 
My recipe for the topping:
  • about 8-10 cherry tomatoes, cut into half 
  • half a zucchini, sliced
  • 2 shallots, roughly chopped
  • 2 brown button mushrooms, sliced
  • about 150g pumpkin, sliced
  • 2-3 cloves garlic, finely minced
  • about 8-10 pitted olives, thinly sliced 
  • 1tbsp sundried tomato, finely chopped
  • 3tbsp grated cheddar
1. Preheat the oven to 160deg.
2. Mix cherry tomatoes, zucchini, shallots, mushrooms, pumpkin, garlic in a baking pan. Drizzle with olive oil. Season with salt and pepper or other seasoning. (I also seasoned with balsamic vinegar)
3. Roast the veg for about 15-20min, or until the veg turns soft and a little wrinkly. Let cool and store in fridge.
 
To prep the pizza (I prep everything else the night before, and this step onwards are made in the morning)
 
1. Preheat oven to 190degreeC (fan forced, bottom heat only).
2. Drizzle olive oil on a large baking sheet (can only find aluminium foil in my kitchen) and use fingers to coat thoroughly. Remove HALF the pizza dough from the bowl. Stretch pizza dough into a large rectangle, pressing with fingers to finish forming. Dough will be very thin. (I used a roller to roll my mine into a thin rectangular, measuring about 15cm x 20cm)
3. Lightly drizzle a little olive oil on the dough and use fingers to spread. I spread a layer of tomato puree (something I always have, pre made and stored in fridge).
4. Lay the roasted vege thinly on the tomato puree. Top with grated cheddar, followed by olives and sundried tomato and a few Thai basil leaves (available freshly in my garden).
5. Bake for 10 to 12 minutes, or until crust is golden brown and the cheese is bubbly. Remove from pan and slice with a pizza cutter. Serve immediately!

Thursday, October 17, 2013

Soymilk sweet-potato pau with fried turnip filling 紫番薯包内陷沙葛炒虾米

This morning, I'm a happy bunny cos I had my first homemade savory pau for breakfast and it tastes awesome!! I also specially made two into lil' fat piglet shape to give to my friend Wendy who's celebrating her birthday today. This was the message I wrote to her, ‘朋友, 我送你两只肥猪仔,

“猪”福你: 猪笼入水,青春永驻(猪)’ 够贴切吧! 
 
I made these cos I had just enough portion of starter dough left from my previous pumpkin pau, and it is Wendy's birthday and mom's back today, it would be right to make these for them. I'm glad they turn out delicious. It's also my first time making my own 'Ju Hu Char' (fried turnip with dried shrimp), I was so surprised it tastes soooo much like the Ju Hu Char I had at Little Penang. Another pat on my shoulder. Hahaa... sorry if you're reading this, I just gotta be complimented for getting them right the first time.


The lil' fat piglet lost weight after its sauna session (after steaming).


After making my own version of Ju Hu Char, I only read to know that it actually means fried cuttlefish. Funny cos mine hasn't got any trace of cuttlefish in it. But it was alright, I had dried shrimps in mine to give it a similar taste. This is an all-time favorite whenever I frequent Little Penang, the Ju Hu Char is served inside a raw lettuce leaf. I thought I can have leftover after making the pau, but I was wrong. I only had just enough for 16 pau.
 
My Ju Hu Char recipe:
*1 small turnip, peeled and cut into thin shreds, about 2-3cm length (can also grate with cheesegrater)
*1 medium carrot, peeled and cut into thin shreds, about 2-3cm length (can also grate with cheese grater)
*3 cloves garlic, finely minced
*about 1-2tbsp dried shrimps, finely chopped
*2 Chinese mushrooms, washed and soaked (retain the soaking water), finely sliced
*Seasoning like salt, pepper, soy sauce and oyster sauce
*Thickener like cornflour in water (I ran out of cornflour, I made do with oatflour, which worked, surprisingly)
 
Instructions:
1. Heat up 2tbsp grapeseed oil in a heated wok.
2. Stir in garlic and dried shrimp.
3. Fry until fragrant, stir in Chinese mushrooms (without the soaking water), carrot and turnip. Fry for about 3min.
4. Season with salt, pepper, soy sauce and oyster sauce. (I cant give the exact amount cos I just add everything by eye ball / by tasting it to get the right taste)
5. Pour in about 1/2 cup water (water used to soak mushrooms). Add in more if seems a little dry.
5. Simmer for about 10min. At the end, if dish is still a little wet, add in thickener. (This is used as pau filling, so it cant be too wet)
6. Leave to cool before being wrapped in pau.
 
 
For the pau recipe, this recipe makes about 20 pau, I made 16 with filling, 4 plain ones for the lil' fella.
I used the previous pau recipe I attempted, but with slight modification.
*Starter dough 100g
*Hong Kong flour 300g
*Instant active yeast 1tsp
*Warm unsweetened soymilk 100g
*Purple sweet potato puree (I used soymilk to blend the steamed sweet potato when making it into puree) 150g
*Brown sugar 20g
*Salt 1/8 tsp (forgot to add this in, so the pau turned out quite bland, but I was lucky cos I made a tasty filling)
*1tsp baking powder
*2tbsp grapeseed oil
 
Instructions:
1. Combine all ingredients knead. I used a bread machine to knead. Knead until the dough is stretchy and has smooth surface (about 10min in a bread machine).
2. Leave to proof in an oiled bowl till it double its size. (I did this for about an hour)
3. On a floured surface, punch the risen dough to deflate it, this is my favorite step.
4. Divide into small pieces weighing 40g.  
5. Roll into flat round disk (thin on the edge and slightly thicker in the middle).
6. Wrap about 1.5tbsp Ju Hu Char filling in it.
7. Place onto non-stick parchment paper.
8. Let proof for another 30-40min.
9. Steam in vigorously boiling water for about 12min. Wrap the lid with a tea towel to prevent the condensate from dropping back onto the pau, which will uglify the outlook. Do not open the lid right away. Let cool gently so that the skin of the pau wont turn wrinkly.
 
*I did Step 1-7 the night before. Then take them out the next morning to further proof for about 20min in a warm-ish oven.
 
Also need to mention, I came across this cute lil' piglet shape from Happy Home Baking.
 
I am also submitting this soy sweet potato pau and Ju Hu Char recipe to the Little Thumbs Up "Soy Beans" event organized by Bake for Happy Kids, my little favourite DIY and hosted by Mich of Piece of Cake. You can link your soy recipes here.

Wednesday, October 16, 2013

Soymilk cheese omelette

Soymilk is such a versatile ingredients. Since I have some unsweetened soymilk in the fridge and I need to use it up as soon as possible, cos soymilk turns bad quick, I have been using soymilk replacing milk in almost all cooking and baking this two days. I have done soymilk oatmeal, soymilk pumpkin pau, and now even soymilk cheese omelette. The good thing about it is that it is very fragrant but not too overpowering. And most importantly, it's so nutritious for the little tummy. Kudos to Mich from Piece of Cake for hosting this month's Little Thumbs Up with soybean as its theme.
 
The lil' fella must have been exhausted after returning home from the babies play date happening at Vivian's house, he drank a bottle of milk and konked out for almost two hours. I accompanied him on the bed blog-hopping with my phone, and when he woke, it was almost dinner time. I hadn't got much time to prepare porridge. So I just quickly prepared steamed-soft-brown rice to go with soymilk cheese omelette and cut into thin strips for him. Now that he's quite good with firm food with textures, I am gradually turning his usual porridge into soft rice (more like risotto or rice stew).

His brekkie: Soymilk oatmeal with pumpkin and red bean

His dinner: Stripped soymilk cheese omelette served w soft brown rice
Ingredients:
*2 eggs (I used two eggs cos my pan is big. It seems a waste to be just cooking with one egg, so this recipe made two portions for him)
*small chunk of Japanese cucumber, finely minced
*1/4 onion, finely minced
*half a cup of unsweetened soymilk
*2tbsp of grated cheddar cheese

Instructions:
1. Beat the eggs with soymilk. Season with black pepper or other seasoning.
2. Heat up 1 tbsp. of grapeseed oil in a wok.
3. Stir in finely minced onion and Japanese cucumber, when soft, pour in egg-soy mix to cover the whole pan and turn heat to low. Cook one side on low  heat. Sprinkle grated cheddar cheese. Flip to the other side to cook.
4. When slightly cooled, cut into thin little strips and serve with brown rice.
5. Drizzle over 1/2 tsp of organic flaxseed oil prior to serving.

I am submitting this humble dish of mine to the Little Thumbs Up "Soy Beans" event organized by Bake for Happy Kids, my little favourite DIY and hosted by Mich of Piece of Cake. You can link your soy recipes here.

Tuesday, October 15, 2013

Soy milk pumpkin bun (pau) with red bean filling

I have always wanted to make 'pau', somehow I was not courageous enough. I am not great with anything that requires 'proofing'. But the lil' fella is a big fan of 'pau'. When we were at the dim sum restaurant on Sunday, he also had his portion of the pau (only the pau skin, cos he isn't eating any meat yet or anything too flavorful like the char siu in the pau). Poor him, the char siu filling was so generous that he didn't have much skin to eat. So I decided to try my luck with steamed bun (pau). I have done mantou before. I should be fine (keeping my fingers crossed).
 
This time, I went through a lot of blogs about making pau to decide on the best pau recipe. Finally, I decided on the recipe by Carol. But I dunno if I've missed out when reading through her blog (in Chinese) or it was the fact that her pau recipe didn't contain any oil or shortening, I added in 'butter' to mine (this I referenced Honey Bee Sweets, cos she too used Carol's recipe and accidentally added butter into hers and it turned out to be the best pau recipe ever, shouldn't go wrong ai?).
 
I had some nice fragrant red bean paste made few weeks ago and was stored in the freezer. It was not sweetened yet. I made it into a thick red bean paste by cooking it with some brown sugar.
 
I came across Sonia's pretty pumpkin bun shaped like a pumpkin, but I wanted to use Carol's recipe (which was plain), so I just added in pumpkin puree to replace partial amount of water/milk.
 
I made plain ones, but braided for the lil' fella. I learnt of the pretty braided shape from Mui.

Wrap the lid with a tea-towel so that the condensate won't go back onto the pau.
Prior to steaming.

After steaming.

 
Pumpkin bun with red bean filling.


Soft fluffy plain pumpkin pau for the lil' fella.
 
Recipe modified and translated from Carol.
*old dough 100g *I did this step too, according to her, it improves the fragrance and texture to great extent. But I had to leave mine in room temperature for about 3hours for it to double its size. It didn't proof when in the fridge.
*Hong Kong flour 300g (I didn't use pau flour, cos I went through the ingredient list, it already contain sugar, shortening etc in it, I didn't want it. I wanted to adjust my own)
*Instant active yeast 1tsp
*Warm unsweetened soymilk 100g
*Pumpkin puree 80g
*Brown sugar 20g
*Salt 1/8 tsp
*50g butter, cut into small cubes, left at room temperature
 
Instructions:
1. Combine all ingredients, except for the butter, and knead. Add in butter when all ingredients are combined. I used a bread machine to knead. Knead until the dough is stretchy and has smooth surface (about 10min in a bread machine).
2. Leave to proof in an oiled bowl till it double its size. (I did this for about an hour, cos it was early in the morning when I did this, and the weather was quite cool, I had to leave it on the top of fridge to proof).
3. On a floured surface, punch the risen dough to knock out all the trapped gas.
4. Divide into small pieces weighing 50g  (I should be able to use 35g in future).  
5. Roll into flat round dish (thin on the edge and slightly thicker in the middle).
6. Wrap about 35g red bean filling in it.
7. Place onto non-stick parchment paper.
8. Let proof for another 30-40min.
9. Steam in vigorously boiling water for about 12min. Wrap the lid with a tea towel to prevent the condensate from dropping back onto the pau, which will uglify the outlook. Do not open the lid right away. Let cool gently so that the skin of the pau wont turn wrinkly.
 
For the plain, braided bun
From step 4 onwards,
4. Divide into small pieces weighing about 40g. For each piece, divide further into 3 lot and roll into thin sticks. Braid.
5. Roll the braid and place in silicone cupcake liner.
6. Let proof for another 30-40min.
7. Steam the same way as above.

Overall, I am very very satisfied with the outcome. Love the buttery aroma that lingers in my kitchen. I considered this an easy one, cos I did most of the kneading using my bread machine. This is definitely a keeper recipe, and I'm already thinking of making a savory meat pau for mom when she's back in Sandakan this Thursday.
 
I also made extra for a babies' play date happening this afternoon. It's Hari Raya Qurban today, so it's a public holiday where we are. Happy holiday chumps!


I am also submitting this soy pumpkin pau recipe to the Little Thumbs Up "Soy Beans" event organized by Bake for Happy Kids, my little favourite DIY and hosted by Mich of Piece of Cake. You can link your soy recipes here.

Minced vege and tofu in tomato sauce 番茄汁配杂菜豆腐

I also call this 'baby-friendly mapo tofu'.

The theme for Little Thumbs Up is soybean this month. So it's time I whip up a storm using anything soy. I bought a few blocks of soft tofu and I knew I can use it to cook something for the lil' fella's dinner.

I still have half a bottle of tomato sauce / puree in the fridge (something I always make and store so that it'll come in handy for the lil' fella's pasta, it's just tomato and onion, skinned and pureed), so I made him this dish and it was served with organic brown rice meehoon - minced veg (zucchini and onion) with soft tofu in tomato sauce. I wanted to further enhance the flavor by adding a dash of liquid amino, only a dash was needed cos the flavor of tomato and onion was sufficiently awesome! (I couldn't resist myself from eating his food cos it was so good :p)

 
The lil' fella gets excited when he sees food.
 

Ingredients:
*1 clove garlic, minced
*1 soft tofu (cut away the sides of the tofu, they tend to be drier), cut into little cubes
*a small chunk of zucchini (leave skin-on, cut into little cubes)
*half a small onion, minced
*1/2 cup homemade tomato puree
*season with dash of liquid amino (for further info on this, read here)
*organic brown rice meehoon, presoaked in water 30min and boiled till soft

Instructions:
1. Heat up 1tbsp grapeseed oil in wok. Stir in garlic.
2. When garlic is gently toasted, stir in zucchini and onion. Fry for about 3min, stir in tofu.
3. Pour in tomato puree.
4. Gently simmer for another 3-5min until zucchini and onion is soft.
5. Serve with mee/ meehoon or rice.

This is such a delicious and appetizing meal. I would definitely prepare it for the lil' fella again.

*If you're wondering why have I been cooking with zucchini so much this few days, that's because I just got back from KL and I lugged back some yellow and green zucchini, so I'm trying out everything with zucchini in order to use them up.

I am submitting this humble dish of mine to the Little Thumbs Up "Soy Beans" event organized by Bake for Happy Kids, my little favourite DIY and hosted by Mich of Piece of Cake. You can link your soy recipes here.

Monday, October 14, 2013

Banana Bread (Curtis Stone)

I always get really ecstatic whenever I see over-ripe bananas on my kitchen counter. Actually, I always wish that they brown quick so that we can't eat them up in time, and I get to use them to bake. Over-ripe bananas are good for baking, they make the cakes or muffins or bread extra sweet and moist. This is a recipe by the take-home-chef, Curtis Stone. I decided to make my banana bread using his recipe, cos a blogger whom I followed commented that this is a keeper recipe, it results in super moist and soft banana bread.


Recipe (adapted from here)
 
1.5 cups all-purpose flour (I used superfine flour)
1 teaspoon baking soda (I changed to baking powder, cos I don't like the taste of baking soda esp. in my non-sweetened cakes)
1/4 teaspoon cinnamon (I used all-spice powder)
1/4 teaspoon salt (I used pinch of salt)
2 large eggs
1 ¼ cups sugar (I only put in 1tbsp sugar)
1/2 cup vegetable oil (I used grapeseed oil)
1 ½ cups coarsely mashed very ripe bananas (3 large)
2 tablespoons yogurt (no yogurt available, so I just used leftover apple puree)
1 teaspoon vanilla extract
1 ½ cups walnuts, toasted and chopped (I omitted this, cos the lil' fella is not eating nuts yet)
 
*I never followed a recipe 100%, never ever, cos I seldom have everything on the ingredient list available all at the same time, and I always just make do with whatever I have available. I bake for myself and the lil' fella (who's turning one this month), the reason why I usually omit or cut down by a lot the sugar on the ingredient list. As a result, my cakes or muffins are only nice and soft and moist when fresh out of the oven. When kept overnight, it will turn dry. But I heat them up in the microwave and serve with cold apricot jam (for myself), still yummy :)
 
If you're baking this for kids and adults, I would suggest that you follow the original recipe, or at least put back in some sugar. Hahaaa.. me and the lil' fella has quite bland tastebud.
 
Instructions:
  1. Preheat oven to 175°C (fan forced). Butter 1 (9- by 5- by 3-inch) metal loaf pan, then dust with flour, knocking out excess.*I should have covered my batter w. aluminium foil cos my cake turned out to be quite brown on top, but it was only just done inside.
  2. Sift together the flour, baking soda, cinnamon, and salt into a bowl.
  3. Beat together eggs and sugar in bowl of electric mixer at medium-high speed until very thick and pale and mixture forms a ribbon when beater is lifted, about 10 minutes. Reduce speed to low and add oil in a slow stream, mixing, then mix in bananas, apple puree, and vanilla extract. Remove bowl from mixer and fold in flour mixture gently but thoroughly.
  4. Pour the batter into the loaf pan, spreading evenly. I topped with sliced banana for decoration.
  5. Bake in middle of oven until golden brown and a wooden pick or skewer comes out clean, 1 to 1 1/4 hours. (I only baked for 50min)
  6. Cool loaf in pan on a rack 10 minutes, then turn out onto rack. Turn loaf right side up and cool completely.
This banana loaf cake (or banana bread) is okay for freezing. I stored half the loaf in the freezer after cooled and sliced, so that we can have something for breakfast when we don't have anything available to eat.


Sunday, October 13, 2013

Chinese mushroom with zucchini in soy sauce on meehoon 豉油冬菇‘菜’碎米粉

I am wondering how I should name this dish cos it's something I invented using whatever ingredients I found available in the fridge. I wanted to name it 冬菇肉碎, but it would be so wrong, cos it hasn't got any meat in it, so I just name it 冬菇‘菜’碎 (which means Chinese mushrooms with minced vege).
 
I really like cook or bake-along, cos it allows me to try different cooking method using something I am not familiar with. This month's theme ingredient for Little Thumbs Up is soybeans, hosted by Piece of Cake. When I first knew of the theme, I was at lost on what I can cook or bake with. All I can think of is just baking with soymilk. Shameful to say, I'm not a great Asian cook.
 
This afternoon, I was gonna cook an Asian delight for the lil' fella. The lil' fella is turning one end of this month. He has been eating mostly western culinary all this while (pasta bake, fish pie, fish cakes, oatmeal, bread and muffins), cos it's something I am familiar with. But I thought I'm gonna try something different today, let's intro something Chinesy- into his diet. I soaked 2 Chinese mushrooms, handful of gojiberries, a bundle of organic brown rice vermicelli (meehoon) and thought I would prepare him a soupy meehoon. I started cooking and ended up with a dry meehoon, but the end result was good! I seasoned it with this version of soya sauce (hahaa.. not sure if I'm gonna be disqualified from Little Thumbs Up, cos this is not a real soy sauce, but it's justifiable cos this is a super healthy alternative to soy sauce, and it's made from fermented soybean! The difference is, it has no salt as its ingredients, which is just perfect for moms cooking for their little one under two, who are still on a salt- and sugar-free diet).


I have learnt about liquid amino as an healthier alternative to soy sauce since my uni- years but I have not been keen on it, cos I have this impression that it's just an alternative (I love using authentic genuine ingredients when cooking or baking). But comes to my lil' one's diet, I got to factor in the health reason. So here's me, starting to use liquid amino cooking for the little baby.
 
Recipe:
*2 Chinese mushrooms, presoaked in water for about 2-4hours (keep the soaking water), after soaked, slice or finely mince them
*1tbsp goji berries (wolfberries) 枸杞, presoaked in water for about 30min
*bundle of organic brown rice meehoon, presoaked in water for about 30min
*1 clove garlic, finely minced
*a small chunks of zucchini (or any vege available in fridge), finely minced
*Seasoning: Liquid Amino and toasted sesame oil
 
Instructions:
1. Heat up about 1 tbsp. grapeseed oil (my choice of cooking oil for the lil' fella) in a wok.
2. Throw in finely minced garlic. Stir fry till fragrant.
3. Put in finely minced Chinese mushrooms, goji berries and zucchini. Gently stir fry for about 3-5min.
4. Add in the soaking water, about 1/2 cup, add more water if necessary.
5. Simmer the mushroom and vege mix for about 10-15min.
6. For toddlers above two, you may wanna thicken the sauce with cornflour in water. But I didn't do this for my lil' fella.
7. When mushroom is soft, season with liquid amino and toasted sesame oil.
8. In another pan, boil meehoon until soft. I scissor-cut the cooked-meehoon to bite-size for my lil' fella.
9. Serve the mushroom and vege sauce on top of meehoon.


I finished cooking and blogging about this (in about 2 hours) and the lil' fella is still in slumberland. Great! But I got to be prepared to deal with a super-charged lil' fella running / crawling around. Scary thoughts!  
 
I am submitting this to the Little Thumbs Up "Soy Beans" event organized by Bake for Happy Kids, my little favourite DIY and hosted by Mich of Piece of Cake. You can link your soy recipes here.

Saturday, October 12, 2013

Cheddar cheese and zucchini muffin

Sometimes, I don't like to have sweet stuffs for breakfast. Since I still have some leftover zucchini that I brought back from KL and there are some nice tasty cheddar cheese in the fridge, I have decided to make this zucchini muffin for myself and also the lil' fella. I have read and come across zucchini muffin a lot, but I haven't given it a try myself. The ingredients seems simple and okay for the lil' fella.
 
If you're looking for a soft fluffy savory muffin, this is a MUST-TRY. I was quite surprised of the soft fluffiness. Been baking muffins for the lil' one, and because most of his recipes don't have sugar, so the muffin may turn out to be quite dense. This muffin, too, doesn't consist of any sugar, but it end up so soft and moist. Must be the zucchini and cheese that gives it the moist.


Recipe adapted from here. But I halved the recipe to  make 3 standard size muffin.
 
*50g low protein flour (or superfine flour)
*30g grated cheddar cheese (I used Beqa)
*1/2 tsp baking powder
*a pinch of salt (optional)
*half a zucchini (grated) ...
*1 medium egg
*1/2 tbsp. organic grapeseed oil
*40ml milk
*pepper and other seasoning (optional)

1. Preheat oven to 200deg C.
2. In a large bowl, mix together sifted flour, baking powder, salt, pepper and seasoning.
3. In another bowl, whisk egg, add in milk and oil. Add in courgette. Add all to dry ingredients.
4. Spoon mixture into muffin liners to about 3/4 full (this recipe makes 3 muffin).
5. Bake at 200deg C for about 5min. Then reduce oven temperature to 180deg C and bake for another 25min.
 
The lil' fella gets really excited whenever he sees me baking and the muffin fresh out of the oven.


Tuesday, October 8, 2013

Good morning October :) (Moist chocolate cupcake)

Can't believe how fast time flies. Yesterday, I was still saving my recent photos into the September folder, without realizing that it's already October ;p I blame this on the recent holiday spent in KL. I lost count of the dates.
 
I had to remind myself that Josh is turning one end of this month, and I still have endless amount of things to do to prepare for his birthday bash.
 
Worst still, I am shocked to know that we're only a few weeks away from 2014!!! It's crazy!! I am not dreading it, cos Christmas and CNY is my favorite festive season, but it's just hard to believe we're ending 2013 soon!
 
I have a feeling that October is gonna be exciting. This morning alone, I have already done loads. As usual, I prepped the lil fella's porridge for lunch at nanny's. Also prepped his oatmeal for breakfast. This time, I made it a little different. I added cream cheese into it. It's his first time having cream cheese (at his 11th month). The cream cheese made the oatmeal taste so creamy. He wasn't resisting it, so I presume he likes it. The taste was quite subtle cos I only had about 1.5 tsp of cream cheese in it. I added in sweet ripe plums, chopped, into the oatmeal after the oatmeal is steam-cooked. I learnt of this cream cheese oatmeal recipe shared by a mommy from facebook group Healthy Food for My Baby. I'm quite glad to have established this group. Now, it has over 5000 members within a short span of 5 months, with over 1000 members still to be added into the group. I just don't have the time to do it lately. It's not just a platform for me to teach other mommies about healthy eating for their babies, but it's also somewhere for me to get different recipes for my lil' one.
 
Creamy quinoa flake oatmeal with cream cheese and ripe plums.
The lil' fella turns 1 end of the month.
 

This morning, I woke up extra early (at 4:30am) to bake my good friend, Karen a special chocolate muffin for her birthday.  This is a recipe I copied from Ann's blog. According to Ann, this is a must-try chocolate cupcake recipe. It may sound like something simple, but I realized I'm still in quest for the best chocolate cupcake/muffin recipe to bake for my son's first birthday end of the month. So I decided to try this recipe out. I have no regrets. Love it cos it isn't too sweet and it was soft and moist when fresh out of the oven. However, once left to cool, it was still quite dry. I think I may add in extra amount of milk or even mashed banana to it, to ensure it will maintain the moistness for the lil' fella's birthday bash. But overall, I'm satisfied with the outcome and I think I've found 'the' recipe.


After baking the cupcakes, I was still early and the lil' one was not awake yet. So I made myself a zucchini and pasta salad for breakfast. I brought back zucchini from KL (sigh.. some stuffs are hard to get in Sandakan).  It was quite a refreshing and nice light meal for breakfast. Been eating out for the past few days when we were in KL. This is perfect to tame my tummy after all the sinful indulgences. For recipe, please refer here.


Monday, October 7, 2013

Creamy cream cheese and zucchini pasta

After having inspired by a mommy on the Healthy Food for My Baby network to use cream cheese when cooking for the lil' fella, I'm getting more adventurous with it and decided to use it again for his pasta dinner tonight.
 
Cream cheese is something I have resisted giving to him all this while. But now that he's turning one this month, I'm more fuss-free when comes to the ingredients I use, just like egg (started using egg white and yolk baking for him starting 11month) and fresh milk.  
 
While writing this post, I also surfed for some info on cream cheese and babies. To my surprise, I realized this, cheeses such as Brie, Feta, Camembert, Roquefort, and Bleu Cheese are amongst those called "soft" cheeses.  These cheeses are typically not cultured and in many countries, are not made from pasteurized milk; they are made from raw milk. Cream Cheese is not considered a "soft" cheese that you need to avoid because it is pasateurized.
 
After reading this, I realized I have been fooling myself by avoiding cream cheese for him for the past 5months?!? Oh well, we learn all the time.
 
This is a creamy white sauce pasta and it's relatively easy to prepare. It tastes really cheesy.. cos I also added in grated cheese prior to serving. He loved it!! I knew he enjoyed it cos he was making noise of 'smucking' and 'smooching'  when he ate it. He always does that whenever he's eating something that he finds delicious.


1. Boil mini pasta (I used organic correlini, mini pasta tubes, suitable for babies and toddlers) in water till soft.
2. Finely chop zucchini and a clove of garlic.
3. Heat up 1tbsp of grapeseed oil in a frying pan. Gently stir fry the garlic and zucchini till it turns a little golden brown.
4. Add in 1tbsp of cream cheese and 1-2 oz of milk (formula milk or fresh milk). Season with herbs and pepper.
5. Simmer for 3min. Serve with pasta.

Thursday, September 26, 2013

Easy cous cous salad for breakfast

I love cous cous!! In my last trimester of pregnancy with Josh, I had cous cous salad for breakfast almost every morning. I was having salad for breakfast the last trimester, cos I was diagnosed with gestational diabetes. I was cursing it initially. But after going on the low-sugar and low-carb diet for 3 months, I gave thanks to it, cos I was never so healthy for my entire life and I was fit and lean, despite heavily pregnant. I lost my pregnancy weight gain within the first week after giving birth, without doing anything, but just pumping (breastmilk).
 
After I gave birth, I stopped the hard-core 'salad-for-breakfast' days, cos I got freed from GD. Hahaa.. But occasionally, I still love having it cos it's such a light and refreshing way to kick-start the day.
 
I had some nice cherry tomatoes and Japanese cucumber lying in the fridge, I thought I should use them up before they get rot. So the night before I quickly washed and chopped up the ingredients and prepped the cous cous for my next-morning breakfast. My cous cous salad is made with whatever I find available in my fridge or kitchen counter. It would be even nicer if I have some cooked chickpeas or black eyed beans in it. But this time, I have some left over coralini pasta left from my son's dinner last night, I just added them in for extra texture.
 
Recipe:
*Half a Japanese cucumber, chopped
*About 6-8 cherry tomatoes, chopped
*2 slices of sun-dried tomato (I used Jamie Oliver's brand) (sun-dried tomato in jar is a staple in my fridge, so versatile for my salad)
*1/2 cup of cous cous (cooked by pouring in about 1.5cups or less of boiling water and let steam for about 10min)
*seasoned with pinch of salt, mushroom seasoning, cracked black pepper and 1/2 tsp of coarse Dijon mustard
 
The next morning, I prepped an omelet (I'm an avid egg lover) and serve it with my cous cous salad. Nice, wholesome and refreshing! Yet, easily done.


Related Posts Plugin for WordPress, Blogger...