Showing posts with label Christmas. Show all posts

Tuesday, December 31, 2013

Chocolate lava cake for breakfast? Good bye 2013

It's the last day of 2013, and I've got no bread for breakfast. And there's only little milk left for lil' fella's oatmeal. So I just made this (!!) for breakfast. Hahaa! What a brekkie! Oh well, it's a good way to end 2013, in style, indulging :p
 
This is actually a simple chocolate lava cake recipe by Martha Stewart. We've baked it a few times (with my baking buddies). But somehow, we either get it or not each time. It's the baking temp. and time. I keep on forgetting that I need to bake it at 200deg C (even in a fan-forced oven) at 9-10minutes!! I finally got it right this time! Just the way I want it, the way the chocolate oozes out.. Yummm!!


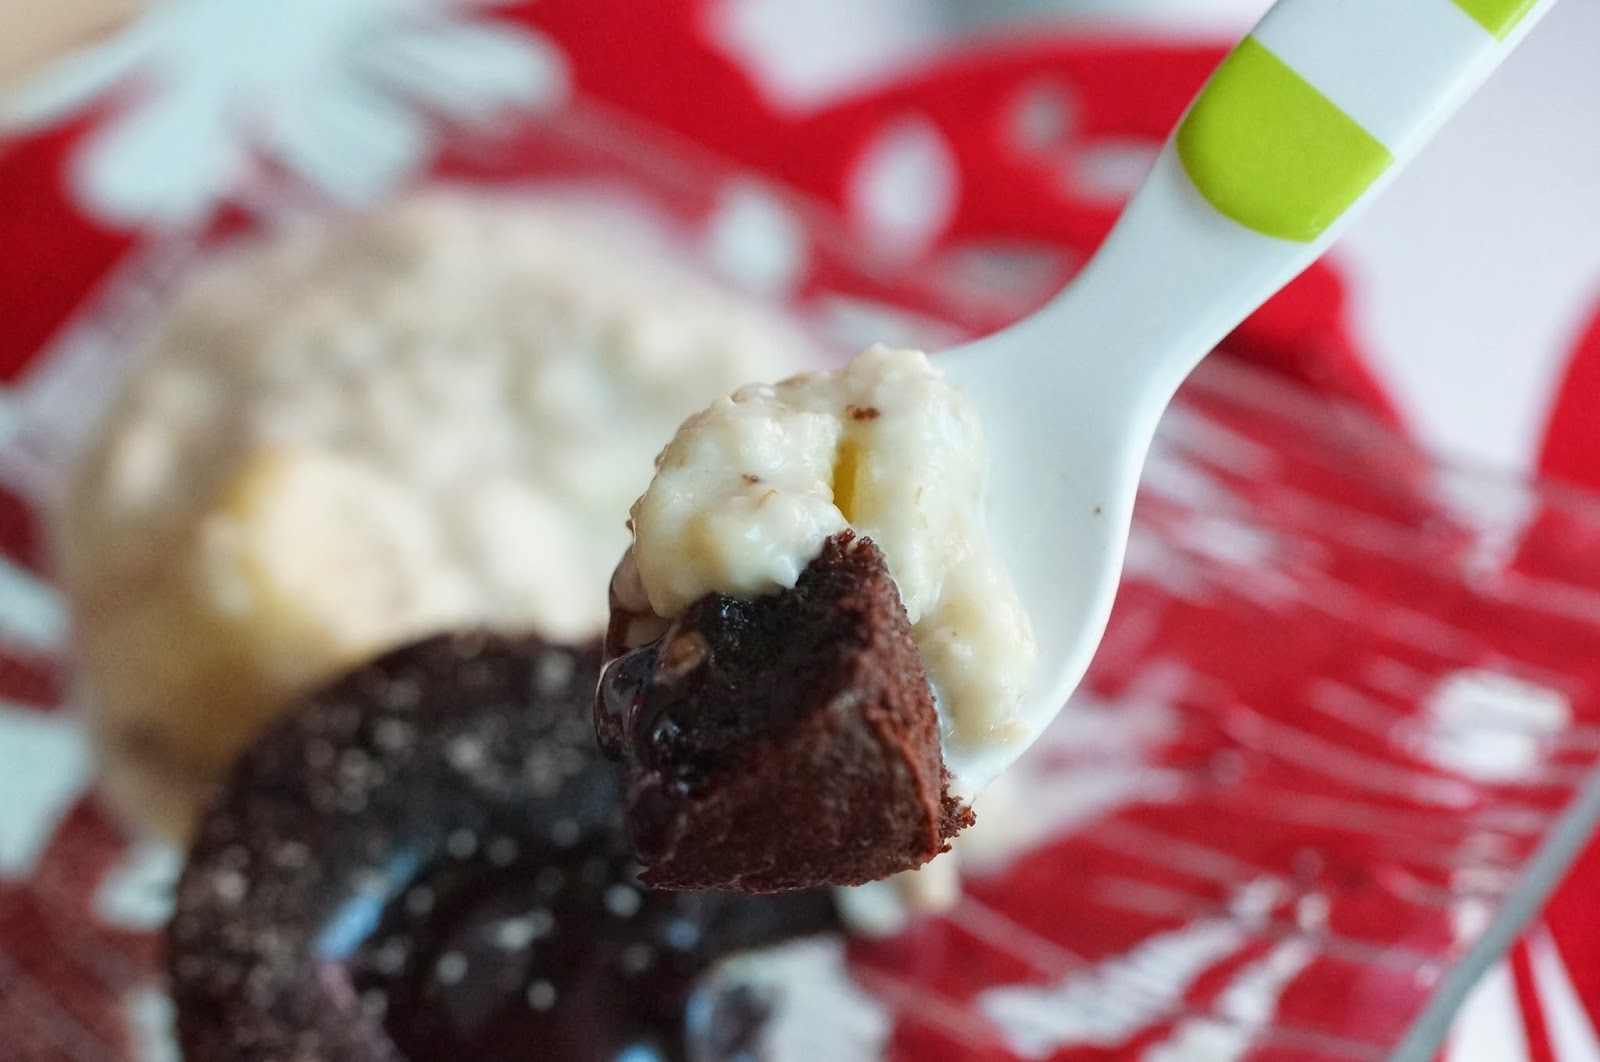
Chocolate lava cake with oatmeal. What a brekkie!

Recipe (adapted from Martha Stewart's)
*60g unsalted butter, room temperature, plus more for ramekin dish   
*3tbsp molasses
*3eggs
*1/3 cup all purpose flour
*pinch of salt
*250g bittersweet chocolate, melted

  1. Preheat oven to 200 degrees C. Generously butter 6-7 small ramekin dish.
  2. In a mixing bowl, cream the butter and molasses until soft and fluffy. Add eggs one at a time, beating well after each addition. Beat in flour and salt until well combined.
  3. Beat in melted chocolate until just combined. Divide batter evenly among ramekin dishes.
  4. Bake for 9-10min. Remove from oven. Let stand for 5min.
P/S: I wanted to add a dash of cognac into the cake. But I held it off, cos 'it's just a breakfast!'!! :p
 

I'm submitting this post to Baby Sumo's Christmas Recipe Collection 2013 event, hosted by Baby Sumo of Eat Your Heart Out.

Cheese and onion breakfast scones

We had a baking session today. This baking session was postponed from Christmas day, we were supposed to bake Christmas cookies. Since Christmas was over, so we made changes from cookies to scones, a savory one, cos we just finished eating our chocolate lava cake.
 
My friend Yiling was browsing through the recipe for easy cheese and onion scones from the internet and we modified and adapted the recipe till it become ours. But a good and easy ones. And I loved our the texture turned out. It's like a cake rather than the dense scone texture. Love this so much, I made them again for breakfast the next morning :)


Served them as breakfast with baked beans.


Recipe

*200g all purpose flour
*1.5tsp baking powder (I used natural baking powder, aluminum free)
*80g cold butter, chopped in little pieces (or grated frozen butter)
*pinch of salt
*80-100g grated cheddar cheese
*half a small onion, finely minced
*pinch of cayenne, or 1/2 tsp of Italian herbs, dried
*100g cold milk
  1. Preheat the oven to 190deg C (fan-forced).
  2. Combine the flour, baking powder and salt. Add in the cold grated butter.
  3. Mix in the cold milk. Gently mix in the chopped onions and grated cheddar. (Quite a sticky one)
  4. Cut into round shape scones (or whatever shape desired), using a round glass. Place on the baking tray.
  5. Bake for 15-20min or until golden.

Wednesday, December 25, 2013

Merry Christmas dear son!

Dear baby J,
 
Mommy started this blog to log down everything about you, never have I known that it will turn into more of a food blog, mostly your food, and some of mommy’s cakes and papa’s breakfast. I hope that one day you’ll be able to read this blog and understand more about your own ‘growing up’.
 
This is your second Christmas with us. Mommy can vividly remembers our first Christmas. You were a peaceful one and let us finished our Christmas dinner at peace on Christmas eve. But you woke early on Christmas day, not wanting to miss out anything that happens around you. *The reason why I thought, 'I don't wanna miss a thing' by Aerosmith perfectly describes you :p (Mommy was sorry cos mommy was always rushing, pumping milk, washing and sterilizing your bottles, getting your going-out bag ready etc etc etc). You should definitely check out the song, wonder if it's still available in your era.
 
Second Christmas, it's 7:49am now, and you're still in bed with Papa. Your breakfast and your hot choco-milk has been prepared and well-laid out. But it's alright. You can lie in, cos it's a holiday today, and mommy gets to check my facebook and wishes all friends and families 'Merry Christmas'.


You're definitely the most precious gift granted by Dear Lord to your mommy and papa. You make us grow, trying to be your perfect parents. Your liveliness (guess this is the nicer term than calling you an active baby) keeps us on-the-go at all time, and allow us to never stay idle thus keeping ourselves fit and active.
 
You love mommy's food, giving face to every single meal mommy has prepared for you. You're a friendly and chatty one. When we were out for our Christmas eve dinner last night, you were seated beside another boy, a quiet boy, and you have overwhelmed him with your chattiness. Hohoho.. I wonder where that comes from :p


You're very curious about your surroundings. You call every moving and fury animals 'wow wow'. You love travelling with mommy and papa. But you get really excited and you do not mind forfeiting your nap time just to be awake to know what happens around you. I think that's a good thing cos mommy gets to bring you out for parties and travels and night-out, without you fussing. But sometimes (or most of the time), mommy only wants an early lie-in on the very comfy bed, having my arms over you (of course, you'll push me away, cos you're the sort who doesn't like to be confined).
 
You don't like to be confined. You don't sleep in a cot. You sleep on mommy and papa's big bed, taking up about half of the space. You don't use a walker (you cried loudly when you were placed into a walker at cuz' Kit's place). Some strangers tried to carry you but you cried-protested, and they said, 'O no.. you fear strangers'. I looked at her, thought to myself, 'try let me carry and hug you limiting your movements, tell me if you'll like that?'. Darn, I hate this. Papa said you're inheriting mommy's feistiness, and I sure don't want that. You just inherit as little of it, as possible, alright?

My favorite 'spidey-boy' diaper


Mommy wishes you a very blessed Christmas. May the Lord showers his mercy and blessings upon you, dear Son. May you always be healthy and happy!
 
With love, Mommy

Tuesday, December 24, 2013

Pink japanese souffle cheese cupcakes (beet and mango)

I'm quite nervous when I decided to do this, cos I previously failed big big time when I tried to bake soufflé cheese cupcakes using the steam-bake method. I couldn't master the baking temp. and time for my oven. Keeping my fingers crossed that it turns out good. The girls are coming over to mine tomorrow for a Christmas bake, so I wanted to bake some treats for them. I was thinking of baking the beet red velvet cupcakes that I made yesterday, but seeing that we'll be baking more sweets, I should perhaps serve them something light and not that dense. And I thought of this. Super light! It melts in the mouth. And it's something I wanted to try again after the failure I hit some time back. Most importantly, I wanted to use up the pureed beet I had after making them for my red velvet cupcakes. Love the pink color. Best of all, it's all natural colorant. No artificial stuff in it. Such is the wonder of nature. So beautiful.


This cake has the 'melt-in-your-mouth' texture, just the way it's called, soufflé. But it is so light that one will never be enough. Hohohooo..

This is a recipe that I adapted from a fellow baker from the Facebook group Baking Wonderland.

*125g cream cheese, softened/ melted over bath of hot water
*60ml beet puree
*40ml buttermilk (or milk) (if you want the texture of this cake to be denser, replace this with cream)
*1tbsp grapeseed oil
*3 egg yolk
*1tbsp molasses sugar (fine)***
*1tbsp lemon juice
*30g superfine flour/ cornflour

*3 egg white
*3tbsp of molasses (fine)

*abt 2tbsp of chopped up mango (optional)

***The sugar content of this cake has been greatly reduced. Please top up with another 2tbsp sugar if you like your cakes sweet.

1. Combine fully melted cheese with beet puree, buttermilk and oil.
2. Beat egg yolk with sugar till it turns thick.
3. Combine egg yolk mix with cheese mix. Add in lemon juice.
4. In another mixing bowl, beat egg white with molasses till it forms a stiff peak.
5. In 3 batches, add the egg white meringue into the egg yolk batter.
6. Combine thoroughly and divide batter into 12-13 cupcake liners. Top with few cubes of fresh mango.
7. Tap the cupcake a few times to remove trapped air (not too sure it's needed here, but it's just a usual procedure I do with light cakes)
8. Bake (steam-bake) at 150deg C for 35-40min. This was baked using my toaster oven.

Hooray!! I've finally succeeded with my 'steam-baked' Japanese soufflé cheese cupcakes.

This should be my last post before Christmas. Merry Christmas!!


I'm submitting this post to Baby Sumo's Christmas Recipe Collection 2013 event, hosted by Baby Sumo of Eat Your Heart Out.


Monday, December 23, 2013

My 'au naturel' beet red velvet cupcakes with roasted chestnuts

Very vibrant red color from the freshly pureed beet.


Everyone, me included, goes gaga when we sees red velvet cakes. I've book-marked a few recipes to try baking them myself. But after some reading up about them, I realized that in order to attain that vibrant pretty red color, I have to add in about half bottle (about 1-2oz) of the red colorant. Whoa!!? Having worked with food colorant before, I know where they come from. The natural ones cost a bomb. Most of them are artificially made and there's a danger to them. Some kids get anaphylactic shock eating food that contains them. Since my cakes are gonna be shared with friends and with my lil' one, I didn't want to add in the red colorant. Then I continued searching until I come across this recipe, which contains the ingredients I wanted, natural colorant - beetroot! and I also wanted a recipe that uses oil instead of butter (to give it the light texture) but still uses buttermilk. And I'm absolutely pleased with this. It's super light and moist, and I couldn't taste the beet (I was afraid that the earthy taste of beet would be too overpowering, it wasn't!) I ended up giving almost all out to my friends, clients and left only 3 for myself, hubby and the lil' fella. Well, Christmas is about giving..

Here's the recipe adapted from here.

Ingredients (this recipe yields about 10cupcakes)
  • 150g superfine flour
  • 15g natural cocoa powder (don't use the Dutch processed ones)
  • 1.5tsp natural baking powder (free from aluminium)
  • 100g pureed beetroot (steamed and pureed)
  • 1/2 tsp lemon juice (original recipe uses vinegar, but I realized the tang never comes through in my cake, can probably up this in future)
  • 1/2 cup buttermilk (1/2 tbsp. lemon juice in 1/2 cup of full cream milk and let sit for 10min)
  • 100g molasses sugar
  • 130ml vegetable oil (I used virgin coconut oil)
  • 1 egg
  • scraped vanilla seeds from a pod
  • about 3-4 roasted chestnuts (mine was from a package)
Method
1. Preheat oven to 165deg C (I used a toaster oven).
2. Sift dry ingredients and set aside.
3. Peel skin off beetroot and cut into cubes. Steam with about 3tbsp water. Puree in a blender.
4. Using a hand held beater, I combine the pureed beetroot with oil, lemon juice, vanilla and egg.
5. Add dry ingredients to the wet batter. Mix thoroughly.
6. Spoon batter into cupcake liners, till about 90% full (knew that this cupcake is not gonna rise much). Sprinkle with some chopped roasted chestnuts on top.
7. Bake for 18-20min or until an inserted toothpick comes out clean.
8. Let cool completely before icing with cream-cheese frosting.

Molasses cream-cheese frosting
(I don't have white icing sugar, I never use them. For all recipes I bake or cook with, I use molasses to replace the sugar. For icing sugar, I just replace with molasses sugar that I've blitz to fine powder)

  • 70g butter, room temperature
  • 120g cream cheese, room temperature
  • 150g molasses sugar, sifted
  • 1tsp pure vanilla extract
1. Beat butter and cream cheese until well combined.

2. Add in vanilla and sift in half of molasses icing and beat until combined. Then sift in the remaining sugar and mix until smooth and thick.


I'm submitting this post to Baby Sumo's Christmas Recipe Collection 2013 event, hosted by Baby Sumo of Eat Your Heart Out.


Monday, December 16, 2013

Chocolate hokkaido chiffon cupcakes


This is like my third time trying out these, I'm trying to make them 'near perfect' cos I'm gonna bake them for Isaac's birthday party in Sandakan. Isaac was my son's twin-friend, the use of 'was' cos they used to look very alike, but now that they have grown up, they don't look that alike anymore. But both of them still look adorable! I can't wait for the party.
 
The first time I made these, it was tasteless. I cut down the amount of sugar added, then I realized I was using molasses sugar (which only had half the level of sweetness the normal sugar). For this bake, I still felt it's quite bland when eaten on its own. But when I piped the cream in, it was just nice, the sweetness from the cream has balanced the cake out. I think I'm nearly there.
 
Here's the recipe, adapted from here
This recipe yields about 8-9cupcakes.
 

Ingredients:
3 egg yolk
20g molasses sugar
35ml grapeseed oil
60ml warmed chocolate milk (I used milo)
1/2 tsp vanilla extract
60g superfine flour
10g cocoa powder
1tsp chocolate emulco (I added this cos I wanted to give it a deep intense brown color)

3 egg white
 25g molasses sugar

1. Warm up the chocolate milk in a microwave for about 30sec to 1min.
2. Sift in flour and cocoa powder.
3. Beat together egg yolk, sugar and oil. Add in chocolate emulco and vanilla extract. Add into milk and flour mix.
4. In another bowl using another beater, beat egg white until it forms soft peak. Add in sugar. Beat until it forms stiff peak.
5. In three batches, add the egg white meringue into the egg yolk batter. Mix to combine.
6. Pour into cupcake liner. Tap a few times to remove trapped bubbles. Preheat oven to 170deg C. (I baked these at 165deg C for about 18min). Bake for about 20-25min.
7. Let cool before piping in the cream filling.


For filling:
1/2 cup of non-dairy whipping cream
Filtered juice from two blackberries, about 1tbsp (I wanted to give the cream a light purple/pink color)

1. Beat till firm (about 3-5min)
2. Scoop filling into a piping bag. Pipe into the cupcakes and decorate.


Friday, December 13, 2013

My first Christmas cognac fruit cake

Macerated my own dried fruits mix for about 24hours.


I am a huge fan of the traditional moist and dense fruit cake, yet I haven't made any before. Recently, I ate a good one but it cost quite a bit. So I decided to make my own, and realized the reason why a good one would cost due to the amount of dried fruits and nuts and the ingredients used (especially the liquor).
 
When I mixed the batter and while baking, I wasn't sure if I was doing it right, cos the cake looks really moist. I kept checking the original recipe, wondering why the ratio of flour: fruits are about 1:7!? But nothing was wrong. This turned out to be a great recipe!!
 
Here's the recipe that I adapted from daily delicious, but I have 1/4th the recipe, should have just halved, cos my baking loaf pan is bigger than the one used in original recipe, that's why my fruit cake appear short. But it still taste good! It was recommended that I should wait for at least two days, but I couldn't, I had it about 2hrs right after it was baked :p.
 
*My macerated dried fruit mix was made from
1/2 cup blackcurrant, organic
1/2 cup green raisin, organic
1/4 cup cranberries, organic, chopped
1/4 cup apricot, organic, chopped
1/4 cup honey (may want to cut this if you prefer it less sweet)
1/4 cup freshly squeezed orange juice
1/4 cup of cognac
 
Macerated for about 24hours in a ceramic dish at room temperature.  (Recommended to macerate for longer duration)
 
350g macerated dried fruit mix
70g raw cashew nuts and walnuts mix, organic, chopped
1.5 eggs
1/2 tbsp. honey
1tsp vanilla extract
pinch of salt
70g butter
2tbsp molasses sugar, organic
1/4 tsp lemon zest
65g cake flour
9g almond powder
50ml cognac (I didn't do this, cos I didn't want my cake to be too strong)

Instructions:
1. Preheat oven to 165deg C (I used my toaster oven).
2. Grease loaf pan with butter.
3. Sift flour and almond powder.
4. Beat butter till soft. Add in sugar, honey and salt.
5. Add in beaten egg, lemon zest and vanilla extract.
6. Mix in 1/2 of the flour mix.
7. Mix in the rest with fruits and chopped nuts.
8. Bake for about 30min at 165deg C.

 
Also submitting this post to Baby Sumo's Christmas Recipe Collection 2013 event, hosted by Baby Sumo of Eat Your Heart Out.
 

Tuesday, December 3, 2013

Pandan bun with red bean filling

This is a hand-knead bun, a truly artisan bun, without making use of bread machine and the texture turned out 'oh so fluffy!' .. I baked these in the shop, I was thinking of baking them so that I can add up to the bread stash in our freezer cos we have, once again, run out of frozen bread, but unfortunately, the moment the bread came out of the oven, some clients started entering the shop, smelled the bread and bought them. I managed to savored one 'Christmas tree' for my son before it gets snatched away.
 

I baked my son another Christmas tree!

These came with toasted walnuts and chopped figs.
 
They were 'O so soft and fluffy!'


This recipe is adapted from Alex Goh's sweet bread dough recipe. But I adjusted it so that it suits our palette. I found the original recipe quite sweet. I have cut the sugar way down.
 
 
Starter dough
  • 100g bread flour
  • 70g boiling water 
Combine together and form into a ball. Leave to chill (in fridge) for at least an hour, or up to 48hrs.
 
Main dough
  • 250g bread flour
  • 50g wholemeal flour
  • 100g all purpose flour
  • 3tbsp molasses sugar (molasses sugar is about half the sweetness level of white sugar)
  • 2tbsp 24cereals powder (or you may use soy bean powder or milk powder)
  • 1 egg
  • pinch of salt
  • 30g grapeseed oil
  • 200g pandan milk (blitz about 10 pandan leaves with about 200ml milk and strain to obtain 200g green pandan milk)
  • 30g butter
  1. Combine all, except butter. Knead, slowly adding in the starter dough by pieces. Knead until all the liquid are well absorbed. Knead in butter. Knead until the dough passes the window-pane test.
  2. Leave to proof for about 1.5hrs or until dough doubles in size.
  3. Divide dough into 50g portion. Leave to relax for about 10-15min (covered with damp cloth).
  4. Wrap each one with red bean filling. Form into a ball.
  5. Leave to rise in a warm area for about an hour.
  6. Bake at 165deg C for about 15-20min. Using a toaster oven, I baked these for about 15min.


Related Posts Plugin for WordPress, Blogger...