Showing posts with label baking. Show all posts

Friday, November 22, 2013

Baked/ Roast honey lime chicken breast

The vegetarian shop nearby has closed down :( I ain't a vegetarian, but at times, I get sick of eating outside food and I would resort to eating there, cos its food is less oily and less seasoned. Argh.. but now it's no more there. So I try and make my own lunch, which I guess is a good thing. I made this roast chicken breast today, so that I can have extra roast chicken left for salad tomorrow morning for myself, the lil' fella and also the hubby.


Marinated this piece of chicken breast with
 
  • Grated garlic and ginger (I used a cheese grater)
  • Oyster sauce
  • Bragg's liquid amino (soy sauce)
  • Toasted sesame oil, organic
  • Salt and cracked black pepper
  • Blackstrap molasses (great as a replacement for honey, it gives it that stickiness and also the BBQ flavor and the hint of sweetness, not too overpowering like honey)
  • Lime juice
I couldn't specify the amount used, cos I was happily pouring everything in, without trying to remember how much of everything put in.

I also slice two piece of the sweet lime and covered the upper part of the breast, in order to seal in the juices, or else the meat may gets too try. I covered the chicken with aluminum foil for the first 20min of baking, and only removed the foil last 5min. This was very effective in helping to keep the meat succulent and juicy.

Note: should remove the rind/ skin of the lime, it gave the juice a little bitterness :p

I baked this (with my toaster oven) at 190deg for 25min.

Ate half the breast, and left the other half for salad the next morning. Further marinated the remaining ones with Japanese Goma dressing.


My hubby loved this salad very much, with a special mention on the chicken. Guess I'll be making more of this in the future, also means more roast chicken for lunch for me :p 

Tuesday, November 12, 2013

Hokkaido milk loaf with raisin (wholemeal)

It's been a few very busy days for me here. Now thinking back, I didn't know what I was occupied with. It could have been the cooking class on Saturday. Or maybe it was the planning for our next family trip to Bangkok. Oh well.. I am back here again.. baking and blogging.
 
This time, I made the Hokkaido milk loaf, cos our buns/ bread in our freezer has ran out and I need to replenish my stocks as soon as possible. Mom's leaving Sandakan this Saturday. I still have a few days to bake and add up to the stocks. When mom leaves, I may not have the luxury of time to bake specialty bread.
 
Many blogger friends have baked this. There was even a bake-along last month. But I missed it. It's a nice, soft and fluffy kind of bread because of the 'flour gelatinization' method (known as 烫种)used. The method helps to breakdown the enzyme in milk, which may inhibit the gluten from working, thus giving rise to a soft fluffy texture. I hope my understanding of the method is correct. Just google it if you wanna know further. Christine, whom I adapted the recipe from, is one of the most-searched blogger breadmaker on  烫种bread.
 
It's growing!

Final proofing

Fresh out of the oven. My house smells like a bakery.


Egg and cream cheese sandwich for brekkie.
 
 
Recipe (adapted from here)
 
Ingredients of tangzhong (湯種 The amount is enough to make two loafs):
  • 50gm/ 1/3 cup bread flour
  • 250ml/ 1cup water (could be replaced by milk, or 50/50 water and milk)
Bread recipe (with my adaptations in blue)
  • 350gm/ 2½ cups bread flour (mine was a wholemeal loaf, I used 300g breadflour and 50g wholemeal breadflour)
  • 55gm/3tbsp+2tsp caster sugar ( I used 1/4 cup honey)
  • 5gm/1tsp salt
  • 56gm egg (equals to 1 large egg) (I only used egg yolk x 1)
  • 7gm/1tbsp+1tsp milk powder (to increase fragrance, optional) (I didn't use this)
  • 125ml/ ½cup milk (full cream milk, I used 1/2 cup plus 1tbsp)
  • 120gm tangzhong (use half of the tangzhong you make from above)
  • 5 to 6gm/2 tsp instant yeast
  • 30gm/3tbsp butter (cut into small pieces, softened at room temperature) (I used about 2tbsp)
Fillings:
  • about 2tbsp dried organic blackcurrants, pre-soaked in carrot juice
Method of making tangzhong (copied from Christine's)
  1. Mix flour in water well without any lumps. Cook over medium-low heat, stirring consistently with a wooden spoon, whisk or spatula to prevent burning and sticking while you cook along the way.
  2. The mixture becomes thicker and thicker. Once you notice some “lines” appear in the mixture for every stir you make with the spoon. It’s done. Remove from heat.
  3. Transfer into a clean bowl. Cover with a cling wrap sticking onto the surface of tangzhong to prevent from drying up. Let cool. The tangzhong can be used straight away once it cools down to room temperature.  Just measure out the amount you need. The leftover tangzhong can be stored in fridge up to a few days as long as it doesn't turn grey. If so, you need to discard and cook some more. (Note: The chilled tangzhong should return to room temperature before adding into other ingredients. )
Method of making bread:
  1. Combine all dry ingredients: flour, salt, sugar and instant yeast in a bowl. Make a well in the center. Whisk and combine all wet ingredients: milk, egg and tangzhong, then add into the well of the dry ingredients. Knead until you get a dough shape and gluten has developed, then knead in the butter. I  used a breadmaker. Wonder if it was because I had wholemeal flour in mine, the dough was a little too dry, I added in an extra tbsp. of milk halfway kneading.
  2. Keep kneading until the dough is smooth, not sticky and elastic. To test if the dough is ready, you might stretch the dough. If it forms a thin “membrane”, it’s done.
  3. Knead the dough into a ball shape. Place in a greased bowl and cover with a cling wrap. Let it proof till it's doubled in size, about 40 minutes (Note: the time will vary and depends on the weather. The best temperature for proofing is 28C). My proofing time was about 60min. I was in an air-cond room and the weather was humid and cold. It's end of the year rainy season now.
  4. Transfer to a clean floured surface. Deflate and divide the dough into four (three for mine)equal portions. Knead into ball shapes. Cover with cling wrap, let rest for 15 minutes.
  5. Roll out each portion of the dough with a rolling pin into an oval shape. Sprinkle blackcurrants evenly as much as you like. Roll from the upper, shorter end down to the bottom. Flatten the dough with your rolling pin. Then roll once again. The seals face down.
  6. Arrange the rolled-up dough in a greased or non-stick loaf tin (as picture). Leave it for the 2nd round of proofing, about 40 minutes, or until the dough rises up to 3/4 of the height of the tin inside. I made this in my shop, and it was still hours before home time. I let it proof in room temperature (air cond, probably about 28deg C) for about 30min, then put it in the fridge and to my surprise, it was still proofing and rising in fridge. I had to leave shop to go home and bake it. I didn't want it to overproof. Phew it turned out fine. Lesson learnt: never bake it too early before home time. There's no oven in my shop.
  7. Brush whisked egg on surface. Sprinkle rolled oat and black sesame seed on top. Bake in a pre-heated 180C (356F) oven for 35 to 40 minutes. I baked mine at 175deg (fan forced) for 30min, with the first 15min having the loaf covered loosely with an aluminum foil, my oven has a tendency of burning the top. Remove from the oven and tin. Transfer onto a wire rack and let cool completely. Slice to serve or place in an airtight plastic bag or container once it's thoroughly cooled. turning the tin upside down. 

Saturday, November 2, 2013

Fish parcel with sweet potato mash (Bill Granger)

One of the lil' fella's favorite dinner dish is mashed potato with cheese and fish (fish is steamed and flaked and added into the mash). It's a dish that is very easy and quick to prepare. I always prepare this for him whenever I don't have a lot of time to spare in the kitchen.
 
Today, I decided to make something similar but prepared in a different manner for his dinner, adapting a technique used by Bill Granger in his recipe of fish parcels with lemon potatoes. I am quite happy to have tried this, cos again, this is another quick and easy one, yet super delicious, in a different way to his usual mash and fish.
 
The lil' fella has just turned one. So I am still opting out some of the ingredients used in his recipe, ie lemon and olives but replaced with whatever I have in my fridge. I also replaced the coriander and parsley with Thai basil (freshly plucked from my garden). The lil' fella seems to not like coriander, just like his dad.
 
From bottom up: sweet potato mash, fish, garlic & seasoning, herb

Pour over cream
 
Wrap up the parchment paper parcel

 
Recipe, adapted from here.
Recipe serves one little boy, aged 1
 
Ingredients:
  • 200g sweet potatoes, steamed and mashed with grated cheddar cheese              
  • 1 clove garlic, finely minced
  • 5 Thai basil leaves
  • 1 white fish fillet, about 100g (I used threadfin)      
  • 2tbsp heavy cream      
  • cracked black pepper and red pepper flakes as seasoning
Method:
  1. Preheat oven to 170deg C (fan-forced).
  2. Prepare 1 30cm square of parchment paper and lay them on kitchen counter. Place the sweet potato mash on it and season with minced garlic, pepper, red pepper flakes and Thai basil leaves.
  3. Top with the fish fillet and pour over heavy cream.  Then pull the sides of parchment paper to and seal to create a sealed parcel (see photo above).
  4. Transfer to the oven and bake for 15min.


Photobucket

I'm linking this post to Cook like a Star (Bill Granger), organised by Zoe, Bake for Happy Kids, Yen from Eat your heart out and Mich from Piece of Cake.

Friday, November 1, 2013

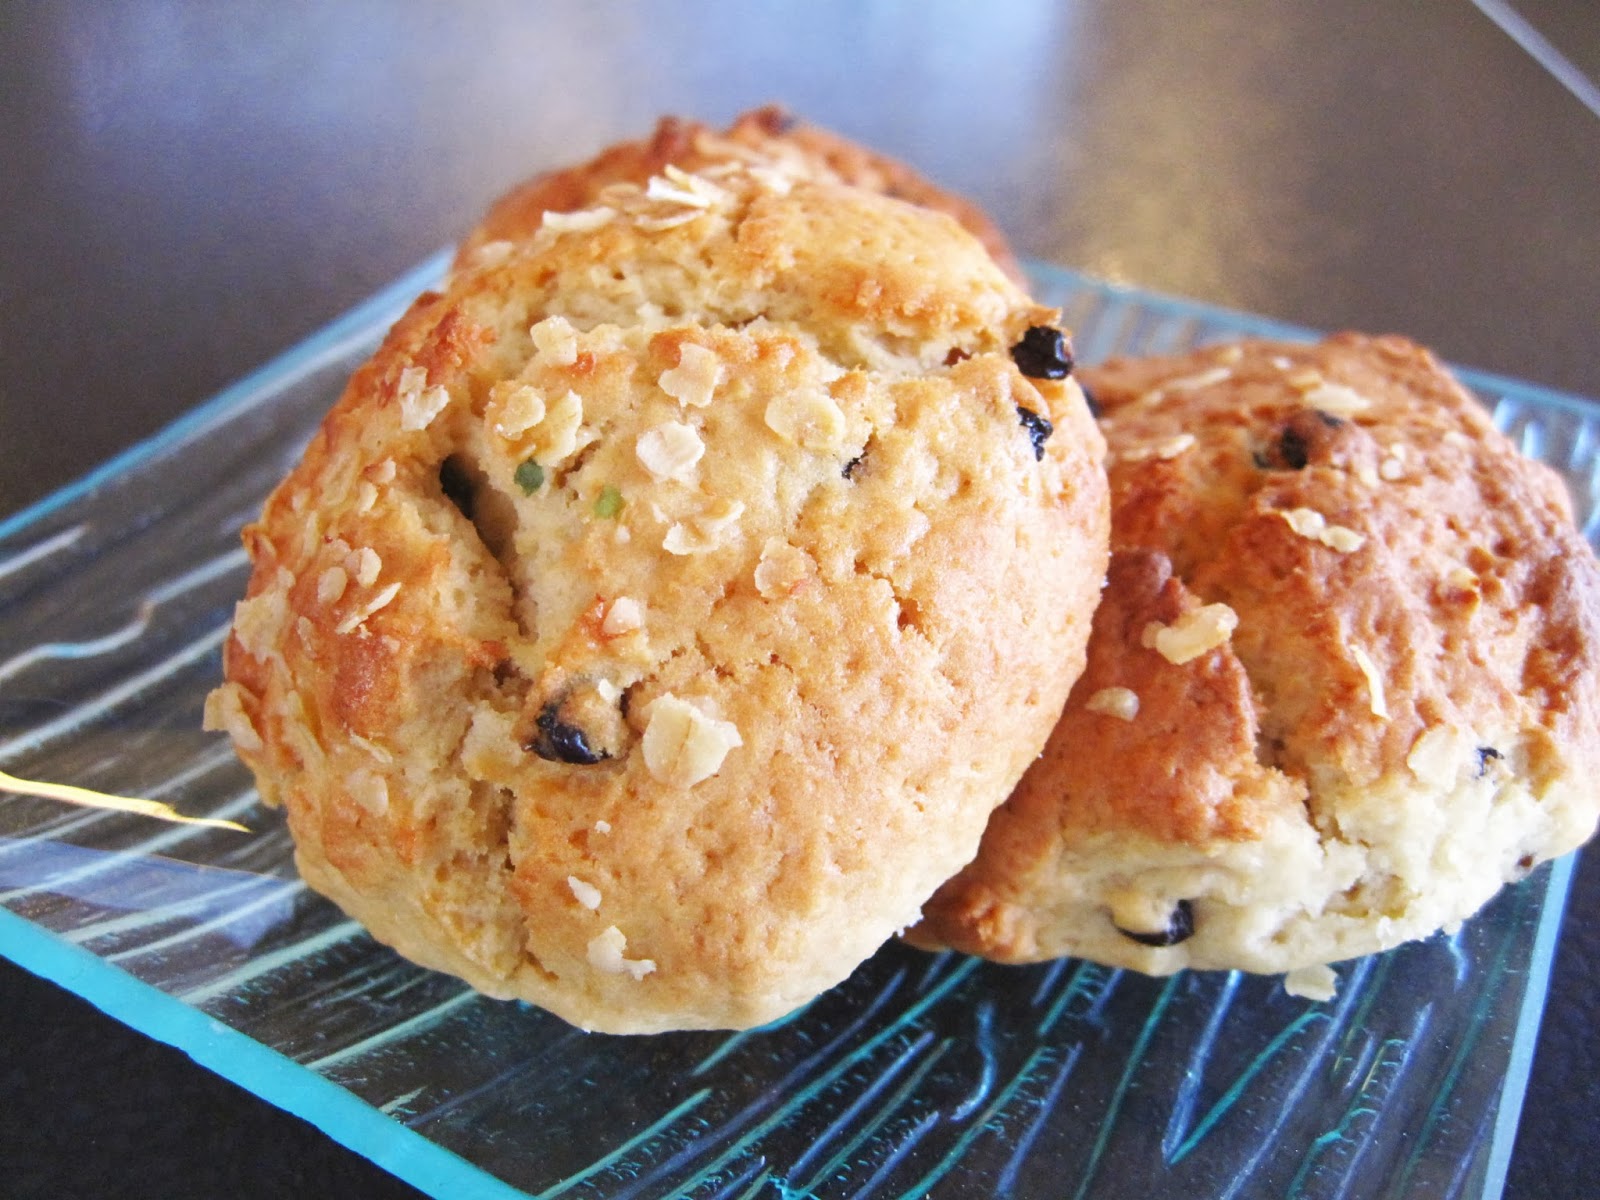
Blackcurrant breakfast scones with choc-chips (Bill Granger)

I have baked scones many times before. All this while, I've been using the recipe by Joy of Baking and have made many variations of it. I have never bothered trying out other recipes, cos to me, they were good. But there was always one problem which I couldn't understand, she mentioned this, 'transfer the dough to a floured surface and knead the dough four or five times', the problem is, my dough was already very sticky when all the ingredients were mixed, there was no way I could have kneaded it. I just quickly made round shape with the dough and placed into the oven to bake.

Blackcurrant Rooibos scones with Joy of Baking's scone recipe

Cranberry & walnut scones with Joy of Baking's recipe
I even managed to retrieve the photos of my scones back from 2011. They looked.. not bad.. hahaaa.. Now I see the problem after I found the secret to making great scones! The problem with my previous scones, they never rose enough to give me that 'waist part' to cut out and spread cream on?!! I've been surfing the net a lot these days (things I do when the little baby is asleep and I have to be by his side, but it's only 8pm, too early a sleep time for me!) and I realized that the secret is to have the butter COLD when the scones are baked, so they will allow for the rise, making way for a fluffy texture. I can imagine the texture of a good scone, but most of my previous scones doesn't give me that texture, cos my butter was already melted when the dough was thoroughly mixed. I read somewhere that I can freeze the butter and grate them into the dough so that the butter is still cold when the dough was formed (I've been surfing so much, I couldn't recall the source of this info). It would even be better to refrigerate the scone a short while before baking. After gathering all these info, I decided to bake scones for our teatime, and will be using a simple scone recipe from Bill Granger. My thoughts, all the scones recipe and ingredients are pretty similar, it's the technique. Let's find out if I was right.


Tada!! Here are the photos of my 'perfect' scones!! Yes!! I was right!! It wasn't about the recipe (sorry to Bill).. cos all the recipes were very similar to each other, consisting of the typical scones ingredients. It was the technique, and the tip is 'COLD'.. everything needs to be COLD, butter, milk/cream and egg. And not to let the butter melt when mixing and kneading. Check out the last photo, see how fluffy the scone is? The amount of sugar in Bill's recipe is considered quite minimal compared to Joy's but it was alright, cos there was the blackcurrant and choc-chips to give it that subtle sweetness, but the texture turned out to be just right.
 
Try this recipe or any scones recipe, but please bear in mind, have all the ingredients mixed and kneaded cold, especially the butter, try this technique, grate the butter with a cheese grater, it works if you want to get good scones.
 
Here's the recipe I adapted from Bill Granger's:
  • 250g self-raising flour + 1tsp of baking powder (I should try 1.5tsp next time and see if my scones tower higher)
  • 1tbsp icing sugar
  • a pinch of salt
  • 100g frozen butter, grated
  • 1/2 cup of organic dried blackcurrant and choc-chips
  • 1 egg, beaten
  • 120ml cream
*The sugar is quite minimal. If you have sweet-tooth, and are baking these for parties, you may up the sugar to 1.5-2tbsp.
  1. Preheat the oven to 190deg C (fan-forced) and line a baking tray with baking paper.
  2. Combine the flour, sugar, baking powder and salt. Add in the cold grated butter.
  3. Mix in the beaten egg and cream. Gently toss in the blackcurrants and choc chips.
  4. Turn the dough onto a floured surface and lightly knead (the tip is to NOT overmix). Press into a 2cm thickness dough (no need to bother using a rolling pin, the scone needs that rugged look).
  5. Cut into round shape scones (or whatever shape desired), using a round glass. Place on the baking tray and brush with some remaining egg and cream left in the measuring jug. Sprinkle with brown sugar and oat.
  6. Bake for 15-20min or until golden.


I usually have coffee. But with some very nice freshly baked scones, I cannot not have tea. A scone isn't complete without a good tea :)
 
Happy November!


Photobucket

I'm linking this post to Cook like a Star (Bill Granger), organised by Zoe, Bake for Happy Kids, Yen from Eat your heart out and Mich from Piece of Cake.

Tuesday, October 29, 2013

Kueh bangkit (mom's recipe)

Kueh bangkit (mom's recipe)

I purposely named this mom's recipe, cos comparing mom's to the other blogger's, hers is quite 'cin cai' (simple), the way the ingredients are being measured, check this out:
 
  • 2 packets of tapioca flour (I was like 2 packets? What packet? I thought all brands have different sizing packets? But according to her, all of them comes in 500g packing.. Hm..)
  • 400g icing sugar (we reduced this to 300g)
  • Coconut milk (from one coconut) .. again.. I was like, how big is the coconut? What if I used a huge coconut but the coconut you used was small? ..
  • 6 egg yolk
  • 5-6 pandan leaves, cut into short section, washed and dried
  • pinch of salt
Despite of the cin-cainess, the recipe turned out to be a good one. No wonder she insisted we use her recipe. We made quite a lot from this recipe (about 200 or more), but it was alright, cos we wanted to pack these into small little bags and served them as party favors for the kids for Josh's first birthday, which answers the reason why we are baking kueh bangkit in October, and CNY is not till 3 months later :p  
 
Lil' fella's first birthday's party favors


Instructions: (her recipe consists of no instructions, it's all in the memory, hahaa, but for keepsake, I better write it down)
  1. Place flour and pandan leaves in a wok. In low heat, fry until the flour is light and fluffy, and the pandan leaves turned crispy. Cool and sieve the flour.
  2. Beat eggs and icing sugar till light and pale.
  3. Add in the cooked flour and mix thoroughly.
  4. Gradually drizzle in the coconut milk until the dough is kneadable (may not need to use up all the coconut milk).
  5. Start to knead the dough, until the dough is smooth and is not sticky. Cover the dough with a damp cloth, rest for 30min.
  6. Dust the counter top with some cooked tapioca flour. Also dust the cookie cutter.
  7. Grab a chunk of dough, roll to about 0.3cm thickness, and use the cookie cutter to cut out the desired shape.
  8. Place cut out kueh bangkit onto a lined baking tray. Preheat the oven to 150deg (fan-forced).
  9. Bake for about 15-17min.
Kueh bangkit is always my favorite cookie during the Chinese New Year, I love the way it melts in the mouth when you place it inside the mouth, and this recipe does that. I am glad that we were able to bake it for my son's first birthday, glad to be trying out this recipe, cos CNY is not far away from now. Will definitely bake this for coming CNY :)
 
Note: Kueh bangkit still has that slight crisp on the outside but melts in mouth as soon as it contacts  your saliva. However, it is soft when fresh out of the oven. The crisp only appears once cooled.


Monday, October 28, 2013

My best choco-banana cupcakes


The accidentally crushed M&M created an even better effect.


Cutie mini oreo on sticks and marshmallow pops


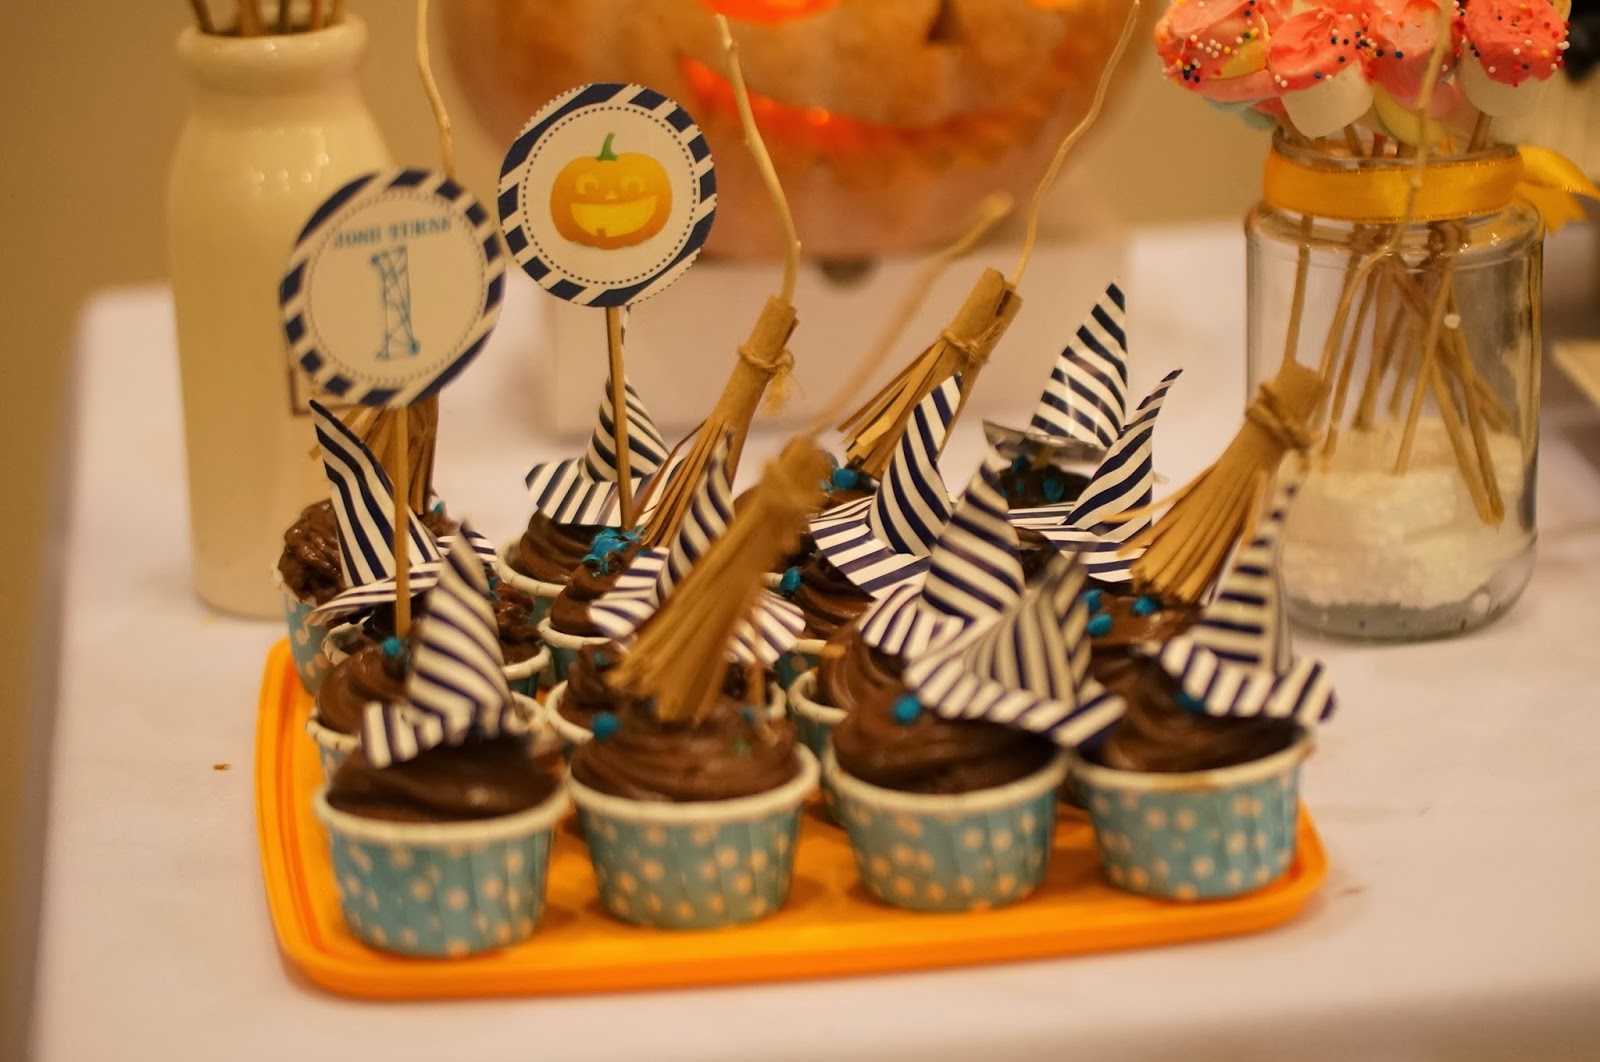
My favorite cupcake topper - witch's broom

 
It was Josh’s first birthday cum Halloween party and I wandered on a few recipes for his birthday cupcakes. I needed a recipe that is fairly simple and straightforward, yet delicious enough to be served to all guests. I needed to bake 60 of them so it can’t be something too complicated.
Initially I wanted to use a sponge cupcake for the base. Tried out a few times, and I realized it wasn’t as ‘simple’ as I thought it would be. The yolk and white separation and beating needs to be quite precise and done well to make good cakes. So I ditched the idea after failing on a couple of attempts making good sponge cakes. My buddy Kim then suggested why not I bake chocolate cupcakes. I considered on it, and thought, why not, it’s chocolate and everybody loves chocolate.

I tried out a few different chocolate cupcake/muffins recipes and finally I chose this. This is highly rated by Ann. I tried it out about two weeks ago baking it for Karen. I realized the cupcakes were super moist and soft a few hours out of the oven. After about a day, it turned quite dry. I couldn’t understand it, cos Ann said that it remained soft and moist even after a day, and it was better after chilled.

On the actual day of baking, I made slight adjustments to it and I knew the slight adjustments shouldn’t ruin the cupcakes. I changed the milk to chocolate milk, reduced the sugar (cos I ran out of sugar), added mashed banana to the recipe and some other minor details (see below for my recipe). It turned out to be the BEST chocolate cupcakes I have ever done! It was still soft and moist even after a day, in room temperature or chilled.

I baked 60 or a little more, I didn’t count. I knew I had more than 60. Baked about 40 standard size and over 20 mini ones. I made two different types of toppings for the cupcakes. Most of the standard size ones were decorated with cute owl-face using mini oreo (which was not easily available in Malaysia, I bought them when I was travelling back from Bangkok at Bangkok Don Muang Airport), mini M&Ms and chocolate ganache (a recipe by Martha Stewart). The mini size ones were frosted using the same chocolate ganache, but whipped and topped with chopped blue M&Ms (to fit in the theme) and some were topped with my DIY witch’s hat and broom (my fav!)

Here’s my recipe for 60 choco-banana cupcakes (make your own adjustment to bake the amount you want)
Recipe modified from Ann’s must-try chocolate cupcakes
  • 300g butter, at room temperature
  • 500g sugar
  • 6 eggs, at room temperature
  • 1tbsp pure vanilla extract
  • 2.5 cup chocolate milk
  • ½ cup of whipping crème/ heavy cream (if you don’t have this, you can just replace this with milk or chocolate milk)
  • 3 tsp baking soda
  • 580g superfine flour (or cake flour)
  • ¾ tsp salt
  • 3tbsp baking powder
  • 50g cocoa powder (I forgot to tripled this from the original recipe, that’s why my cupcakes didn’t appear as dark)
  • 1tbsp chocolate emulco (optional)
  • 9 banana, ripe (I freeze the bananas whole, cos they were too ripe 3 days before the actual day, and on the night before I defrosted them in the fridge)
Instructions:
1.     Sift flour, salt, baking powder and cocoa powder in bowl. Dissolve baking soda in chocolate milk.
2.     Cream butter and sugar till light and fluffy. Add vanilla essence and eggs, one by one, continue beating.
3.     Add in the mashed banana and the rest of the ingredients, chocolate milk and flour mix. Beat till smooth.
4.     Bake in a preheated oven at 160deg (fan-forced) for about 15min (for standard size) and 12min (for mini size). Adjust the temperature for your oven. My oven is a little on the strong side.
5.    Leave to cool on rack before decorating/ frosting.
The owl-decorated cupcakes didn’t need to be chilled but the chocolate ganache frosted cupcakes must be chilled or else the frosting may melt in our temperature.

Note:
1. The Oreos turned soggy after getting in contact with the chocolate ganache.
2. Love it that it was themed Halloween. I got quite messy when decorating or frosting the cupcakes. But it was okay to my own standard, cos it's Halloween, it's supposed to be messy, not neat :p
3. Make all the preparation ahead, this is a doable recipe, I made and decorated all in about 4-5hours.
Read more about the party here:
 

Saturday, October 19, 2013

Egg florentine on pizza

It's breakfast on pizza!!

I had half a batch of pizza dough left in the fridge after baking my first pizza, I gladly make another two mini pizza for breakfast this morning, cos it's Sunday tomorrow and we always eat out with the in-laws for morning breakfast and dinner. As Ree Drummond mentioned (I used her recipe for the pizza base), the base's taste and texture will improve if left in the fridge for a few days. This has been left in the fridge for about 2 days. It was really better than the first attempt. However, I always had to leave it to proof in a warm-ish area for about 30min after taking it out of the fridge. It never really rose or enlarged its size when left in the fridge.
 
This time, I made two mini round pizza, one for me and another one for mom. They were so good, we finished eating one each, and left none for my hubby who was still sleeping. Oppsss.. I decided I shall not post these photos onto facebook, in case he wonders where his is.


I asked mom if she liked her pizza yesterday. She said yes, but would be good with more vege. So I topped up hers (first photo) with more roasted vege. Everything else were the same.
 
Whereas for mine (second photo) - Egg Florentine pizza, I didn't use a tomato puree/ sauce for the base, I used pesto sauce instead. I have an unfinished jar of pesto sauce I bought from Italy few years ago (still tastes and smells okay ;p), so I just spread it over the base and topped up with the same topping, roasted vege and sprinkled with generous amount of cheese, and into the oven they went.
 
After being baked in the oven for 5min (total baking time was 10min), I cracked an egg over mine, and let it baked for another 5min. It came out with the yolk still wobbly soft, just the way I like it :) I had a sore throat gradually developing from the day before, but I still find this so appetizing and finished it in no time.

Simple strawberry swirl cheesecake cups (Wendy's birthday)

This is a seriously simple one. They are made for another dear friend, Wendy's, birthday. I have tried baking complicated cakes for birthday and I always end up making silly mistakes and last minute messes. So this time, I decided I will make this simple, fuss-free, almost fail-proof cheesecake cups.
 
I got so laid-back, that I didn't even want to go through the hassle of making the base for the cheesecake cups. I just place one oreo cookie at the bottom, pour in the cream cheese batter and bake. But I did make the effort of creating these beautiful swirls using some syrups I whipped up using strawberries and blackberries.  


Taking a sneak peep at the cheesecakes


Mom kindly entertained and cared for Josh when I made these.

Recipe (modified from here)
Makes 7 cupcakes in square liners

For the crust: 7 Oreo cookies

For the strawberry and blackberry swirl
  • Handful of strawberry and/or blackberry (I used frozen ones)
  • 1tbsp icing sugar
Heat up all ingredients in a pan until the berries turn soft and the sugar has melted. Pass the mixture through a fine mesh to obtain the syrup.

For the cheesecake
  • 250g cream cheese, at room temperature, cut into small cubes
  • 200g sugar**
  • Pinch of salt
  • 1 tsp vanilla extract
  • 1 large eggs, at room temperature
Preheat the oven to 160deg C (fan forced).
 
Beat the cream cheese on medium-high speed in the bowl of an electric mixer until fluffy.  Blend in the sugar until smooth.  Mix in salt and vanilla.  Beat in the egg, mixing well.
 
Place one oreo cookie on each cupcake liner. Then put in about 2-3tbsp of the cheesecake batter over the oreo cookie. Make 3 dots of strawberry/blackberry syrup over the cheesecake batter. Use a toothpick to lightly swirl and create the marbled effect.
 
*Take note that the cheesecake will puff up to create a beautiful dome when in the oven and will sink slightly after cooled.
**I have already greatly reduced the amount of sugar, I still felt that it turned out sweet. But I had good reviews over them, even my friends who are constantly on a diet, they finished eating them. So I guessed they liked them.
 
This is another simple keeper recipe for cheesecakes. But I may reduce the sugar to 150g in future. If you don't have any berries at home, you may create the swirl using melted chocolate.

Friday, October 18, 2013

Roasted vege pizza

I've been craving for a good homemade pizza for sometime. I don't wanna get them from pizza hut cos they have thick and doughy crust, I wanted something thin, with lots of vege and lots of cheese. I knew I had to make my own.
 
Mom and I had lots of pizza during our last trip to Italy. Mosf of them were just plain pizza with lots of cheese and nothing much else (how the Italians love theirs). I don't mind the generous serving of cheese, but I would love it more with more toppings.
 
Mom just got back to Sandakan and I come across this easy pizza base recipe by Ree Drummond, so I prepped this up the night before to bake as breakfast the next morning. Ree suggested to rest the dough in the fridge for a few days before making the pizza. I didn't have the time. I only rested it from 9pm to 6am (about 9 hours) in fridge and took it out and left at room temperature for about 30min prior to making the base, and it tasted okay. I had half of the dough left after making this one, so that can rest for longer and I get to try the difference.
 
I only used her recipe for the dough, and I went free-style for the topping. I knew what I wanted. Lots of vege (especially those vege that I can't finish and are still lying in the fridge) and lots of cheese.

Before baking: topped up with generous serving of veg.

Before baking: topped with generous amount of grated cheddar and sliced olives

Fresh out of the oven


Pizza and coffee for breakfast, delizioso!

Lil' fella enjoyed the pizza crust too.
Recipe
Adapted from Ree Drummond's Favorite Pizza
 
For the crust (makes two thin crust, rectangle shape about 15cmx20cm)
  • 1/2 tsp dried instant yeast, sprinkled over 3/4 cup warm water.
  • 2 cups all purpose flour
  • 3tbsp extra virgin olive oil
  • 1/2 tsp salt

To make the crust
 
Sprinkle yeast over 3/4 cup warm (not lukewarm) water.
In a mixer (I used my breadmaker), combine flour and salt. With the mixer running on low speed (with paddle attachment), drizzle in olive oil until combined with flour. Next, pour in yeast/water mixture and mix until just combined.
 
Coat a separate mixing bowl with a light drizzle of olive oil, and form the dough into a ball. Toss to coat dough in olive oil, then cover the bowl tightly with plastic wrap and store in the fridge until you need it. ***It's best to make the dough at least 24 hours in advance, and 3 or 4 days is even better.
 
My recipe for the topping:
  • about 8-10 cherry tomatoes, cut into half 
  • half a zucchini, sliced
  • 2 shallots, roughly chopped
  • 2 brown button mushrooms, sliced
  • about 150g pumpkin, sliced
  • 2-3 cloves garlic, finely minced
  • about 8-10 pitted olives, thinly sliced 
  • 1tbsp sundried tomato, finely chopped
  • 3tbsp grated cheddar
1. Preheat the oven to 160deg.
2. Mix cherry tomatoes, zucchini, shallots, mushrooms, pumpkin, garlic in a baking pan. Drizzle with olive oil. Season with salt and pepper or other seasoning. (I also seasoned with balsamic vinegar)
3. Roast the veg for about 15-20min, or until the veg turns soft and a little wrinkly. Let cool and store in fridge.
 
To prep the pizza (I prep everything else the night before, and this step onwards are made in the morning)
 
1. Preheat oven to 190degreeC (fan forced, bottom heat only).
2. Drizzle olive oil on a large baking sheet (can only find aluminium foil in my kitchen) and use fingers to coat thoroughly. Remove HALF the pizza dough from the bowl. Stretch pizza dough into a large rectangle, pressing with fingers to finish forming. Dough will be very thin. (I used a roller to roll my mine into a thin rectangular, measuring about 15cm x 20cm)
3. Lightly drizzle a little olive oil on the dough and use fingers to spread. I spread a layer of tomato puree (something I always have, pre made and stored in fridge).
4. Lay the roasted vege thinly on the tomato puree. Top with grated cheddar, followed by olives and sundried tomato and a few Thai basil leaves (available freshly in my garden).
5. Bake for 10 to 12 minutes, or until crust is golden brown and the cheese is bubbly. Remove from pan and slice with a pizza cutter. Serve immediately!
Related Posts Plugin for WordPress, Blogger...