Showing posts with label birthday. Show all posts

Sunday, November 20, 2016

Baby Mavis's Birth Story


38 week pregnant versus 1 month post natal #wearing the same top

My two lovely babies


I have taken a very long time to share this cos I do not know where to begin. I knew it's gonna be a lengthy one. It all began from my first child's birth. My elder son Lil J was breastfed (mixed feeding) for his first 8mths of life but it was a tough journey as I was an EP (exclusive pumping) mom. There has always been a sense of guilt in me for not being able to direct latch him so when I was conceived with #2 my only wish was to be able to DL her. From my 1st birth, I learnt that we cant only wish, we have to work very hard to earn what we want. I had to have a strategy. I listed down the reasons for failure to DL baby J. 

#1, I was feeling too groggy and tired after my cesarean birth to establish skin to skin and first latch, bottle & teats were introduced before 1st latch 
#2, I had a pair of inverted nipples 
#3, lack of knowledge on breastfeeding

I did a lot of reading and research this round and I knew that inverted nipple wasn't the true reason for failing to DL, it was only my excuse for my own failure (so I would feel better). I was quite certain failure #2 and #3 can be overcome this round, but #1 was not easy.  I felt that I can overcome all of these obstacles if I give birth naturally. I am someone with very low pain threshold, I cant even let a doc perform a VE (vaginal examination) on me let alone birthing a baby naturally. 

To overcome this, I signed up for an online hypnobirthing course. At the end of the course (I was in my 30th week of pregnancy then), I knew I can deliver this baby naturally. 

I checked with my gynae for advices. He was open to the idea of VBAC (vaginal birth after cesarean). Hooray!! cos my gynae is one of the most 'Ganjeong' gynae in town. I then joined prenatal yoga sessions every week to prepare my body for the birth. I remained very active with occassional swim and continued to work hard with my second hand kids books biz (which requires a lot of squatting and moving about). 

At 38th week, my gynae told me, "I know you wanted a natural birth, but due to your GDM gestational diabetes background, I cannot let you give birth later than 39th week (ie week commencing 8/10). You may still need a cesarean birth if you're late. Remember I said, he is the most 'ganjeong' gynae in town. I thought to myself, 'Oh well, I will try my best to delay going to the doc till later on in the work'. I still had high hope for natural delivery. 

10/10/16
2 am, I experienced my first ever contractions / surges. They were about 8-10 min apart and were very bearable. I had never experienced true surges before (my elder, J, was a cesarean baby). I actually thought surges were this bearable? LOL. I took my own sweet time taking shower, final checked on my hospital bag, prepped my son's snacks for school, ate and drank something. 

4:30am, I asked my hubby to send me to hospital. At the hospital, a trainee medical officer told me cynically, this is considered your first birth (first vaginal birth), so it won't happen so soon. He added on, I can guarantee you if I perform a VE on you now, your dilation won't be that much. He was right, a nice female midwife performed VE on me and I was only 2cm dilated. Young MO asked if I wish to go home and wait. I agreed. He continued to say, if nothing happens in 3 days time, I had to return to the hospital and I would probably need a cesarean birth cos of my GDM. I thought to myself, "3 days!?! I was gonna experience contraction for 3 days". 

8am, I was discharged and was waiting for hubby to pick me up. He was late cos he needed to get my elder ready for school. I was already experiencing quite intense surges (about 4 min apart). My mom kept asking why I opted to go home, seeing how unbearable the surges had turned to. I reminded myself, remembering what the MO said, it's not gonna be so soon, so let's just go home and sleep it off. At home, my mom told me she had contractions for over 12 hours before she gave birth to me, her first born. That again, let me to believe that mine is not gonna be so soon. 

9:45am, I had my bloody show. Still in doubt, I told my mom, but I decided to delay going to the hospital, just in case I get sent back (by the young MO again). 

9:50am, my water bag bursted. This time, I asked my mom to call my hubby to be home to send me to the hospital. The surges sensations was very strong, I couldn't walk when the surge came. The desire to poop was very very intense. I couldn't even sit properly, cos I felt something was coming out from the bottom. It didn't help when the road leading to the hospital was so bumpy. I wanted so much to swear or threw a tantrum at my hubby but I controlled myself. 

10:10am, we arrived at the hospital. I went up the delivery ward myself cos hubby couldn't find a parking spot. I screamed when I entered the ward (talk about making an entrance, I remembered vividly there were nurses staring at me). I cried, "Saya mau berak!!" (I need to poop!!). The same young MO, yes he was there, shouted, "No, you can't deliver here!! (on the corridor). They sent me a wheelchair. I refused to go on it, cos I felt very uncomfortable as there was something on my bottom (it was a weird sensation). I said I would walk. The young MO wanted to perform VE on me. God knows how I got the guts and where I got my strength from, I refused the male MO for VE, I requested for a female. He was clearly not happy but he still quickly arranged for a female colleague to check on me. They then realized baby's head was at station zero, I was fully dilated! Everything happened so swiftly then, they didn't even have time to change my attire. No epi was offered. After about 3 pushes, I delivered baby M. Birth weight was a little over 3.2KG. 

It was such a phenomenal moment, I couldn't believe I did it, in such short time and it was an all natural birth!! Went into the ward at 10:10am and baby M was out at 10:30am. I suddenly felt so strong and proud of myself. The tear was quite rough and the stitches took a long time. But by then, I got what I wished for, immediate skin to skin with baby M, she latched on me, strongly. Praises to the Almighty One for the smooth and safe birth. 

At time of blogging, baby M is 40 days old and is still exclusively breastfed (direct latch). I am happy she is exclusively direct latched but both my mom and mom in laws are crying, cos M is definitely not the typical "drink your milk and nap" kinda baby. She is very alert and needs to smell her mommy before she can fall asleep. >.< 

Again, tips to all new mommies, birth and breastfeeding are learned, they don't just come by naturally. Read up and do your research. We can't just wish, we gotta work hard to earn what we want. 


Thursday, October 30, 2014

Marble butter cupcake / Butter cake

Josh turns two today! :) 

2 years ago, I woke up at 7am, got myself ready for my routine check up with my gynae at the hospital. Little did I know I was gonna be pushed into the OT that day, and I would meet the lil' fella that day itself. 

A year ago, I woke up at 5am, if not earlier, to prepare for the lil' fella's first birthday cake, I made chocolate cupcake decorated with owl for his halloween-themed birthday party. 

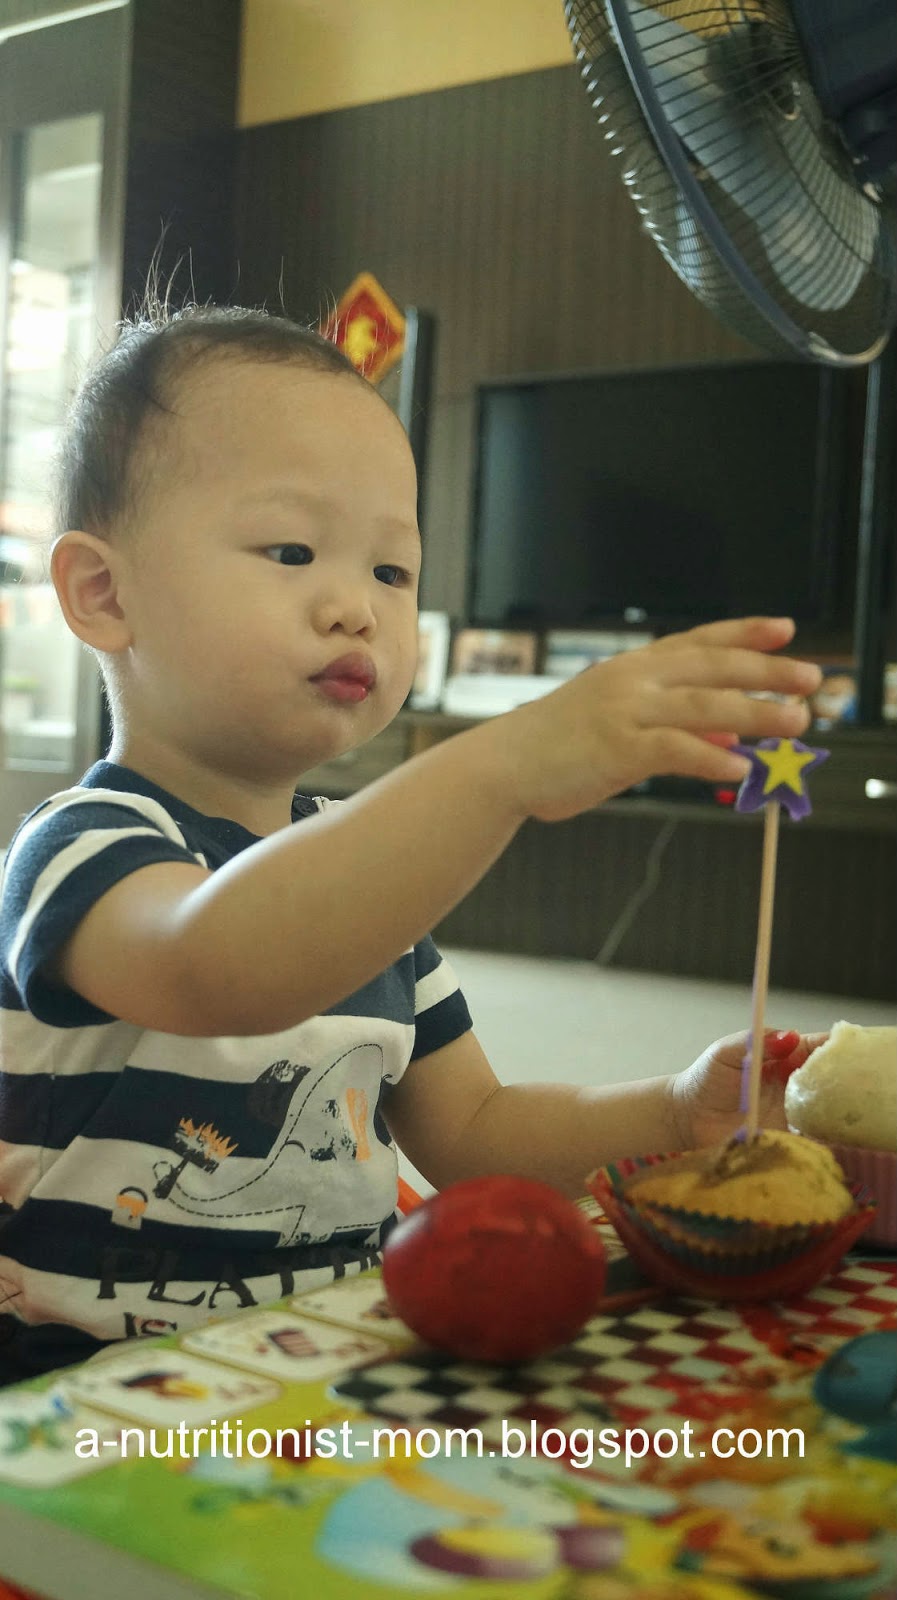
Today I woke up at 6:15am. I made a simple but delicious butter cake, marbled, in a log form (topped with plenty of sunflower seeds) and 2 cupcakes. We're not gonna have any lavishing celebration this year, it's just gonna be a simple one with the family. I prepped his lunch (spaghetti with creamy mushroom sauce), I boiled him some red eggs and got his breakfast ready (steamed bun). Yea, it does seem too much of a breakfast spread for a little two year old. This is my wish for him, that he shall have nothing to worry about, his tummy shall be filled and he'll always be happy in his future years to come. 


I made this very good butter cake few months ago, here. It has gotten very good review from many bloggers so far. So I have decided that I would make it for the lil' fella's birthday cake. I was initially gonna make the easier Steamed Moist Chocolate Cupcake, but I couldn't get unsalted butter. And the only recipe that would go well with the savory butter would be butter cake. And no regrets. It was good! This time, I didn't drastically down the sugar level, cos I used salted butter, worrying that reducing the sugar may affect the ultimate taste. 

Ingredients: 
  • 230g butter, soft 
  • 80g brown sugar 
  • 1tsp vanilla extract 
  • 1/8tsp salt (I omitted this, cos I used unsalted butter in this recipe) 
  • 4 egg yolk
  • 1tbsp fresh milk
  • 200g cake flour 
  • 1tsp baking powder

  • 4 egg white
  • 80g brown sugar

For marbling effect: 
  • 1tbsp cocoa powder
  • 3tbsp hot water
Topping: sunflower seeds (optional) 


Instructions: 
  1. Preheat oven to 170degC. Line a loaf tin. (This time I baked mine at 155degC) 
  2. Cream butter and sugar until light and fluffy. 
  3. Add in yolks, one at a time, and beat until fluffy. 
  4. Sift in flour and baking powder and mix well. Set aside. 
  5. Beat egg white with sugar till turns to soft peak in another bowl. 
  6. Fold egg white meringue into yolk batter. Mix well and fold in the rest. 
  7. In a small bowl, combine cocoa powder and hot water until there is no lumps. Mix into 3-4 tbsp batter in another bowl. 
  8. Pour yellow batter in lined tin, followed by brown cocoa batter. 
  9. Sprinkle generous amount of sunflower seeds on top of batter. 
  10. Bake for 40min (for cupcakes, I baked for 20min) or until an inserted toothpick comes out clean. 


Sunday, March 30, 2014

Black sesame chiffon cupcakes with banana

It was my mom-in-law's birthday yesterday. Coincidentally, all of MIL's siblings were back to Sandakan for the QingMing festival (tomb-sweeping festival 清明节)and we were going out for a 'reunion' dinner. But my hubby only told me it was MIL's birthday in the afternoon. And he asked if we should get a cake. Yet both him and I knew very well that none present at the dinner would like any cakes from outside. They are all well over their 40s and are all very health and sugar-conscious and probably have stopped eating cakes sold outside for decades. I knew I had to bake something, but weren't sure what I should make cos of time constraint. Finally I decided to bake my favorite chiffon cupcake recipe, which I was very familiar with, but I was gonna double up the recipe and gonna add in black sesame as I felt it's a very 'healthy' ingredient. Hohooo... just right for the health conscious ones.. ay?


I was quite proud of myself that I baked them well and at the same time, I needed to make sure the little fella got his milk and took his late afternoon nap before we went out for dinner. All these were done in 20min when the chiffon cupcakes were baking in the oven. Just wondering if the 'pat on the shoulder' should be given to me, or to my little fella for being a good boy yesterday. Sometimes he takes at least a couple of hours before he finally give in to his nap.

Instead of using black sesame powder (which you can obtain simply by grinding toasted black sesame seeds), I used a sachet black sesame cereal drink powder (see photo below). I made up the black sesame drink with a cup of warm water and chilled it slightly before using it in this recipe. This drink is made up of black soya, black sesame, black rice, walnut, blackcurrants, pine nuts, black mu-er 黑木耳 and 何首乌。 I felt that drinking this drink is better than drinking black sesame alone, cos there are a multitude of other antioxidants and nutrients available from other iron-rich grains, seeds and nuts. Black soya, black mu-er and 何首乌 are also great for hair health. I have also used it to bake soft and fluffy black sesame bun with sunflower seeds. 


Here's the recipe adapted from my favorite chiffon cupcake's recipe
(I doubled up the recipe, which made about 17 cupcakes)
*this recipe doesn't yield sweet cakes, if you like your cakes sweet sweet, do consider topping UP the sugar.
  • 4 egg yolks
  • 1tbsp molasses powder
  • 50g grapeseed oil
  • 2 ripe banana (when I doubled up the recipe, I only used 2.5 medium size banana) **
  • 3tbsp black sesame cereal milk drink ** (I pureed the banana with the black sesame cereal drink)
  • 80g sifted cake flour (I used superfine flour)
  • 4 egg white
  • 2-3 tbsp. molasses powder (when I doubled up the recipe, I only used 5tbsp)
Garnish: Raw untoasted organic almond

Instructions
  1. Preheat oven to 165deg C.
  2. Whisk egg whites till they form soft peak. Gradually add in molasses while continuing to whisk. Keep whisking till egg whites just reach stiff peak.
  3. In another bowl, whisk egg yolks and 1tbsp molasses till thick. Add in oil and black sesame cereal-banana mix. Whisk till combined. Sieve in cake flour. Whisk to combine.
  4. Add egg whites to yolk batter in 3 batches. Fold till just evenly mixed.
  5. Divide the batter between cupcake liners till about 70% full. Tap liner gently against worktop to level batter and get rid of air bubbles. Top with an almond for garnishing purpose.
  6. Bake for 20min. Let cool and serve.
Personal note:
I baked these at 165deg C in my toaster oven for first 10min. Then turn down the temperature to 155deg C and baked for another 10min. Just like the owner of this recipe mentioned, cakes crack after first 10min. 

Sunday, March 23, 2014

Mochi cheese puffs (pão de queijo)


It's my birthday today. The little fella treats me a nice sleep in. Instead of waking up at 6am ish, he woke up at 9am, giving me ample time to dress up and bake myself some nice mochi cheese puffs. Now that I'm 3x, I don't have that urge or joy to celebrate it to a great extent, the other reason is also because my grandmother just passed away two weeks ago, so there are no birthday bash this year. It's just a quiet one with my lovely other half and my cheeky little fella eating cheesecake drinking tea in a little café in town.
 
Now, let's get back to this mochi cheese puffs, when my friend Fei Tseh shared about it on FB, I knew I would definitely make it, cos firstly, I love everything that has the mochi texture, secondly, it's a savory item! I am not a big fan of sweet stuffs, but a savory and a cheesy one, that's my cup of tea.
 
Apparently, these mochi puffs are sold at an horrendous price of SGD2.80 for 3 in Sun Moulin Singapore. Interesting.. huh? With that amount, I could have easily baked dozens and dozens of them. I halved the original recipe cos I only had little amount of tapioca flour left, actually, the tapioca flour I had wasn't even enough for half the recipe, I topped up with a little cornflour and it turned out alright. The texture is something like a cheesy Yorkshire pudding, the difference is that Yorkshire pudding isn't made with tapioca, thus this has the mochi-chewiness to it. The little fella had about three for his breakfast!! He clearly loved it. He let out that 'savoring' sound ...Hmmmmmm...(nice).. when he was eating this.
 
Here's the recipe, from here, the following is my halved recipe, which yielded about 5 puffs:
  • 1 medium egg
  • 1/3 cup milk, top up with grapeseed oil, amounting to 1/2 cup
  • 70g tapioca flour + 1tbsp cornflour
  • 25g grated cheddar cheese
  • 25g parmesan cheese
  • punch of salt
Note: Do not be tempted to put in more cheese than stated. Too much cheese will render the puffs heavy and harden its texture.


It's hollow inside, just like a Yorkshire pudding.


  1. Preheat oven to 200deg C (my oven is the over-friendly type, so my temperature was 180deg C).
  2. Put all ingredients in a blender, I used my baby bullet, cos washing up is easy, and lucky that I halved the recipe. It wouldn't have been able to blend all if it was a full recipe.
  3. Grease mini muffin tin with oil. If you're using greased muffin liner or silicon muffin cups like mine, you won't need to grease them. Place in about 2-3tablespoonful of batter in each muffin cup.
  4. Bake for 20min or until risen and golden (I baked for 18min).

According to mummymoo, these keep up to 2 days in an air tight container at room temperature. Just like what she also mentioned, it wouldn't keep that long cos it gets eaten up very soon, and I agree with that.

Monday, December 16, 2013

Chocolate hokkaido chiffon cupcakes


This is like my third time trying out these, I'm trying to make them 'near perfect' cos I'm gonna bake them for Isaac's birthday party in Sandakan. Isaac was my son's twin-friend, the use of 'was' cos they used to look very alike, but now that they have grown up, they don't look that alike anymore. But both of them still look adorable! I can't wait for the party.
 
The first time I made these, it was tasteless. I cut down the amount of sugar added, then I realized I was using molasses sugar (which only had half the level of sweetness the normal sugar). For this bake, I still felt it's quite bland when eaten on its own. But when I piped the cream in, it was just nice, the sweetness from the cream has balanced the cake out. I think I'm nearly there.
 
Here's the recipe, adapted from here
This recipe yields about 8-9cupcakes.
 

Ingredients:
3 egg yolk
20g molasses sugar
35ml grapeseed oil
60ml warmed chocolate milk (I used milo)
1/2 tsp vanilla extract
60g superfine flour
10g cocoa powder
1tsp chocolate emulco (I added this cos I wanted to give it a deep intense brown color)

3 egg white
 25g molasses sugar

1. Warm up the chocolate milk in a microwave for about 30sec to 1min.
2. Sift in flour and cocoa powder.
3. Beat together egg yolk, sugar and oil. Add in chocolate emulco and vanilla extract. Add into milk and flour mix.
4. In another bowl using another beater, beat egg white until it forms soft peak. Add in sugar. Beat until it forms stiff peak.
5. In three batches, add the egg white meringue into the egg yolk batter. Mix to combine.
6. Pour into cupcake liner. Tap a few times to remove trapped bubbles. Preheat oven to 170deg C. (I baked these at 165deg C for about 18min). Bake for about 20-25min.
7. Let cool before piping in the cream filling.


For filling:
1/2 cup of non-dairy whipping cream
Filtered juice from two blackberries, about 1tbsp (I wanted to give the cream a light purple/pink color)

1. Beat till firm (about 3-5min)
2. Scoop filling into a piping bag. Pipe into the cupcakes and decorate.


Tuesday, October 29, 2013

Kueh bangkit (mom's recipe)

Kueh bangkit (mom's recipe)

I purposely named this mom's recipe, cos comparing mom's to the other blogger's, hers is quite 'cin cai' (simple), the way the ingredients are being measured, check this out:
 
  • 2 packets of tapioca flour (I was like 2 packets? What packet? I thought all brands have different sizing packets? But according to her, all of them comes in 500g packing.. Hm..)
  • 400g icing sugar (we reduced this to 300g)
  • Coconut milk (from one coconut) .. again.. I was like, how big is the coconut? What if I used a huge coconut but the coconut you used was small? ..
  • 6 egg yolk
  • 5-6 pandan leaves, cut into short section, washed and dried
  • pinch of salt
Despite of the cin-cainess, the recipe turned out to be a good one. No wonder she insisted we use her recipe. We made quite a lot from this recipe (about 200 or more), but it was alright, cos we wanted to pack these into small little bags and served them as party favors for the kids for Josh's first birthday, which answers the reason why we are baking kueh bangkit in October, and CNY is not till 3 months later :p  
 
Lil' fella's first birthday's party favors


Instructions: (her recipe consists of no instructions, it's all in the memory, hahaa, but for keepsake, I better write it down)
  1. Place flour and pandan leaves in a wok. In low heat, fry until the flour is light and fluffy, and the pandan leaves turned crispy. Cool and sieve the flour.
  2. Beat eggs and icing sugar till light and pale.
  3. Add in the cooked flour and mix thoroughly.
  4. Gradually drizzle in the coconut milk until the dough is kneadable (may not need to use up all the coconut milk).
  5. Start to knead the dough, until the dough is smooth and is not sticky. Cover the dough with a damp cloth, rest for 30min.
  6. Dust the counter top with some cooked tapioca flour. Also dust the cookie cutter.
  7. Grab a chunk of dough, roll to about 0.3cm thickness, and use the cookie cutter to cut out the desired shape.
  8. Place cut out kueh bangkit onto a lined baking tray. Preheat the oven to 150deg (fan-forced).
  9. Bake for about 15-17min.
Kueh bangkit is always my favorite cookie during the Chinese New Year, I love the way it melts in the mouth when you place it inside the mouth, and this recipe does that. I am glad that we were able to bake it for my son's first birthday, glad to be trying out this recipe, cos CNY is not far away from now. Will definitely bake this for coming CNY :)
 
Note: Kueh bangkit still has that slight crisp on the outside but melts in mouth as soon as it contacts  your saliva. However, it is soft when fresh out of the oven. The crisp only appears once cooled.


Monday, October 28, 2013

My best choco-banana cupcakes


The accidentally crushed M&M created an even better effect.


Cutie mini oreo on sticks and marshmallow pops


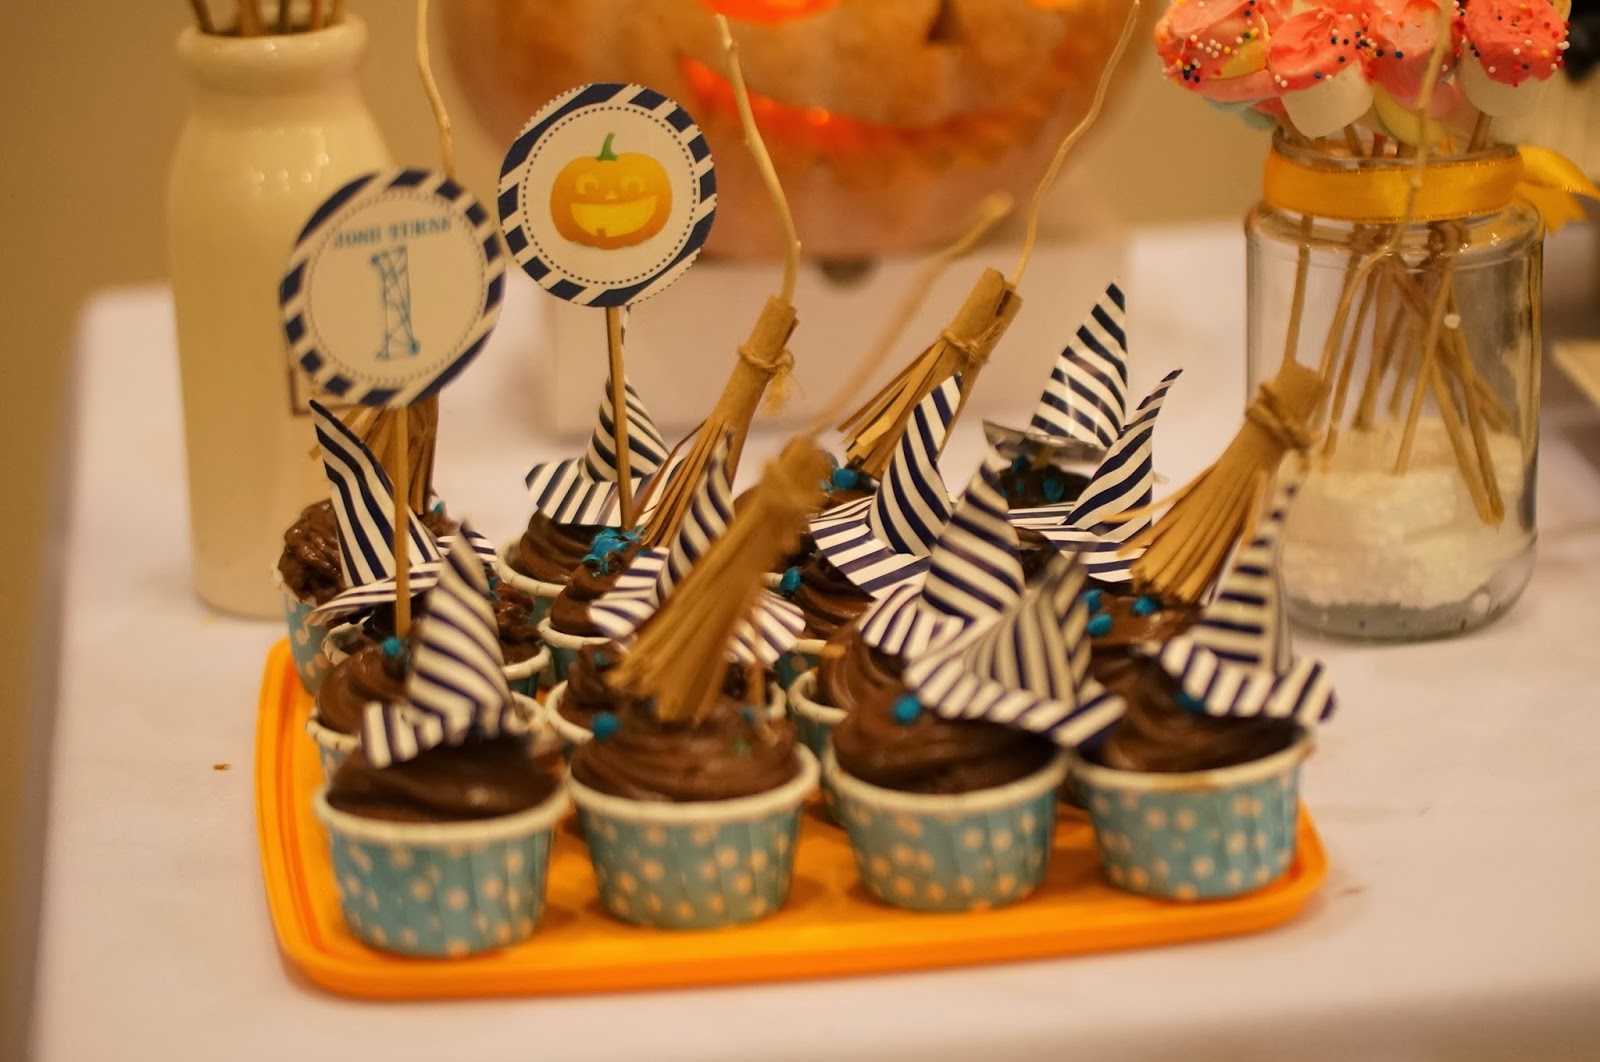
My favorite cupcake topper - witch's broom

 
It was Josh’s first birthday cum Halloween party and I wandered on a few recipes for his birthday cupcakes. I needed a recipe that is fairly simple and straightforward, yet delicious enough to be served to all guests. I needed to bake 60 of them so it can’t be something too complicated.
Initially I wanted to use a sponge cupcake for the base. Tried out a few times, and I realized it wasn’t as ‘simple’ as I thought it would be. The yolk and white separation and beating needs to be quite precise and done well to make good cakes. So I ditched the idea after failing on a couple of attempts making good sponge cakes. My buddy Kim then suggested why not I bake chocolate cupcakes. I considered on it, and thought, why not, it’s chocolate and everybody loves chocolate.

I tried out a few different chocolate cupcake/muffins recipes and finally I chose this. This is highly rated by Ann. I tried it out about two weeks ago baking it for Karen. I realized the cupcakes were super moist and soft a few hours out of the oven. After about a day, it turned quite dry. I couldn’t understand it, cos Ann said that it remained soft and moist even after a day, and it was better after chilled.

On the actual day of baking, I made slight adjustments to it and I knew the slight adjustments shouldn’t ruin the cupcakes. I changed the milk to chocolate milk, reduced the sugar (cos I ran out of sugar), added mashed banana to the recipe and some other minor details (see below for my recipe). It turned out to be the BEST chocolate cupcakes I have ever done! It was still soft and moist even after a day, in room temperature or chilled.

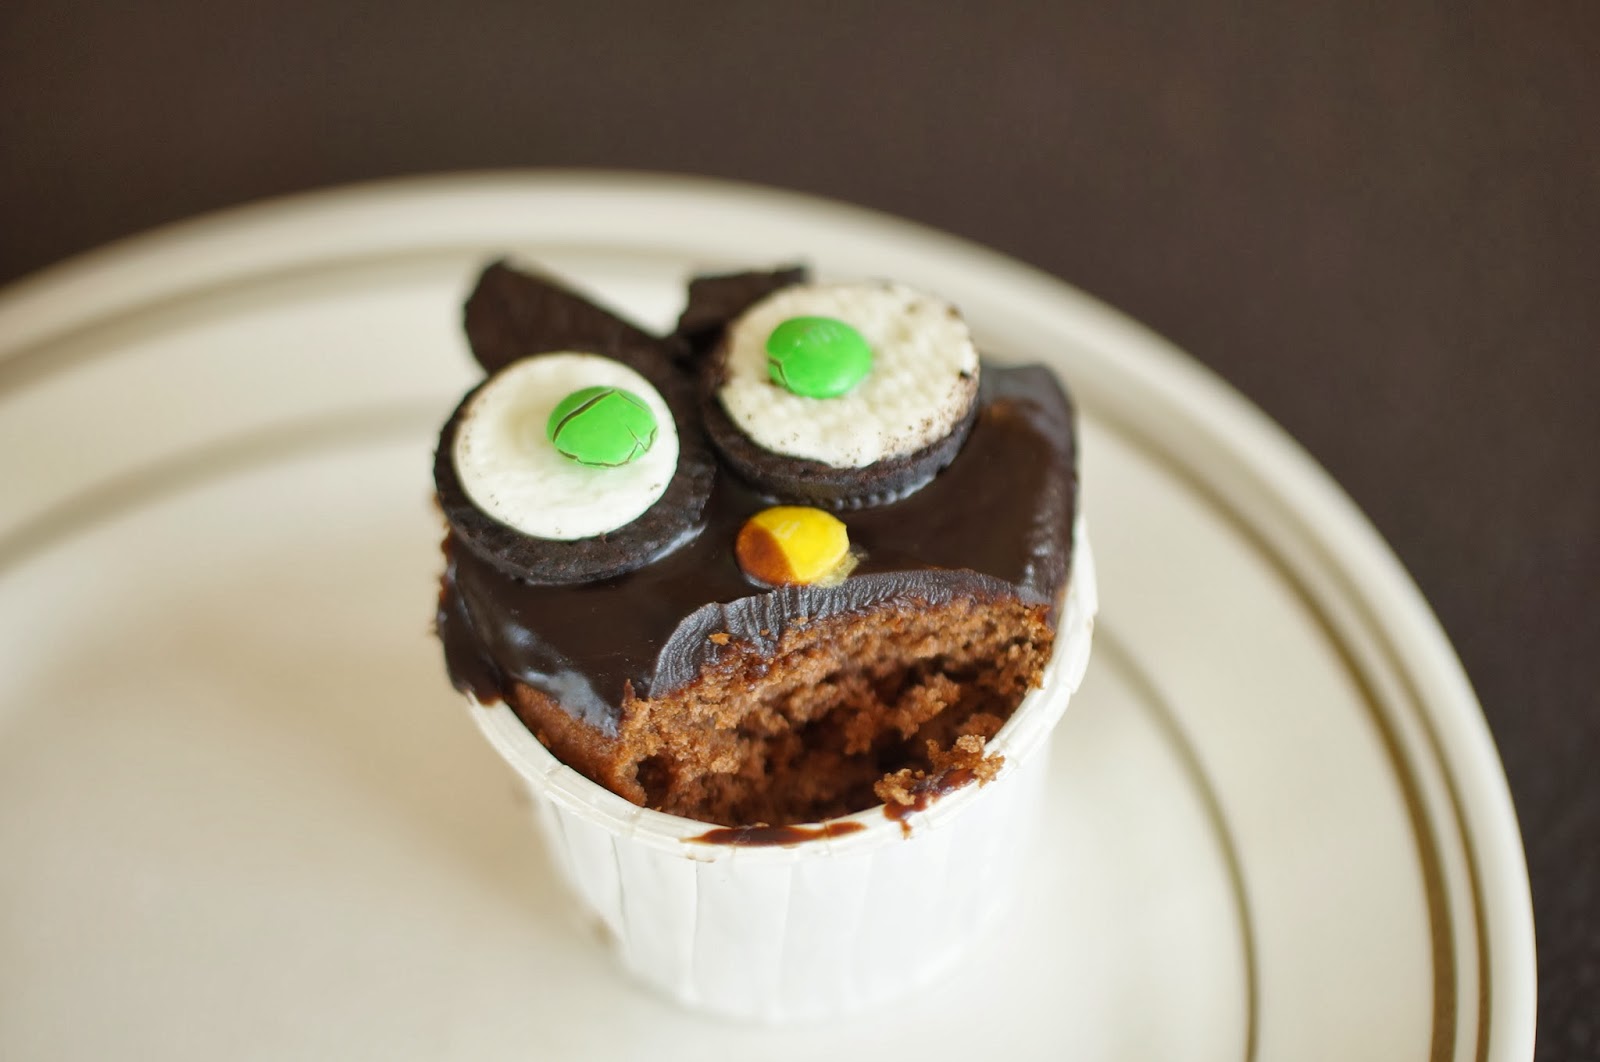
I baked 60 or a little more, I didn’t count. I knew I had more than 60. Baked about 40 standard size and over 20 mini ones. I made two different types of toppings for the cupcakes. Most of the standard size ones were decorated with cute owl-face using mini oreo (which was not easily available in Malaysia, I bought them when I was travelling back from Bangkok at Bangkok Don Muang Airport), mini M&Ms and chocolate ganache (a recipe by Martha Stewart). The mini size ones were frosted using the same chocolate ganache, but whipped and topped with chopped blue M&Ms (to fit in the theme) and some were topped with my DIY witch’s hat and broom (my fav!)

Here’s my recipe for 60 choco-banana cupcakes (make your own adjustment to bake the amount you want)
Recipe modified from Ann’s must-try chocolate cupcakes
  • 300g butter, at room temperature
  • 500g sugar
  • 6 eggs, at room temperature
  • 1tbsp pure vanilla extract
  • 2.5 cup chocolate milk
  • ½ cup of whipping crème/ heavy cream (if you don’t have this, you can just replace this with milk or chocolate milk)
  • 3 tsp baking soda
  • 580g superfine flour (or cake flour)
  • ¾ tsp salt
  • 3tbsp baking powder
  • 50g cocoa powder (I forgot to tripled this from the original recipe, that’s why my cupcakes didn’t appear as dark)
  • 1tbsp chocolate emulco (optional)
  • 9 banana, ripe (I freeze the bananas whole, cos they were too ripe 3 days before the actual day, and on the night before I defrosted them in the fridge)
Instructions:
1.     Sift flour, salt, baking powder and cocoa powder in bowl. Dissolve baking soda in chocolate milk.
2.     Cream butter and sugar till light and fluffy. Add vanilla essence and eggs, one by one, continue beating.
3.     Add in the mashed banana and the rest of the ingredients, chocolate milk and flour mix. Beat till smooth.
4.     Bake in a preheated oven at 160deg (fan-forced) for about 15min (for standard size) and 12min (for mini size). Adjust the temperature for your oven. My oven is a little on the strong side.
5.    Leave to cool on rack before decorating/ frosting.
The owl-decorated cupcakes didn’t need to be chilled but the chocolate ganache frosted cupcakes must be chilled or else the frosting may melt in our temperature.

Note:
1. The Oreos turned soggy after getting in contact with the chocolate ganache.
2. Love it that it was themed Halloween. I got quite messy when decorating or frosting the cupcakes. But it was okay to my own standard, cos it's Halloween, it's supposed to be messy, not neat :p
3. Make all the preparation ahead, this is a doable recipe, I made and decorated all in about 4-5hours.
Read more about the party here:
 

Josh turns 1 birthday cum halloween party (party mode on)

The guests with kids arrived early. It was a wise choice to start the party earlier (6:30pm) so as to reduce crankiness by young babies. Been there, done that, so we knew how tough it is bringing along young babies and tried to be as accommodative as possible.


Read more about the party here:
Related Posts Plugin for WordPress, Blogger...