Saturday, November 30, 2013

Josh's first christmas cookies

These are officially Josh's first ever Christmas cookies =)

It's a recipe by my uni mate, Emma, and I made some minor changes to them and loved how they turned out to be.


O Christmas tree.. O Christmas tree...


Here's the recipe that makes 6 big cookies and 14 small ones.

  • 125g butter, at room temperature, cut into little chunks
  • 1/4 cup molasses sugar (I reduced this to 3tbsp) (for info on baking with molasses, please refer here)
  • 1 cup/ 180g all purpose flour
  • pinch of salt
  • 1/2 tsp cinnamon
  • 1tsp cocoa powder (which you may also change into green tea powder for a green color Christmas tree)
Combine sifted flour, cinnamon, cocoa powder and salt. In the bowl of a mixer, beat butter until fluffy, add sugar, and continue to beat until fluffy. Add flour mixture, and mix on low speed, scraping sides if necessary, until flour is just incorporated and dough sticks together when squeezed with fingers.
 
Roll out dough to about 1cm thickness. Refrigerate until firm, at least 15-20 minutes. Cut out shapes using desired cookie cutter, and transfer to prepared baking sheets (I used a glove when doing these so that the warmth of my palm won't soften the dough too fast).
 
Chill if dough is too soft. Preheat oven to 165deg C. 
 
Bake for about 13 to 15 minutes. Let cool completely on a wire rack.
 
**I made a mistake by having a tray of mixed size cookies. The small sized cookies burn easily before the bigger ones get done. So I should perhaps remove the small sized ones earlier.

Friday, November 29, 2013

German cookies (molasses)

I finished baking these. Went out for lunch. Got back took one. Ahhhhh... they are good!! They tastes divine! They melt in the mouth. Just great for babies!! Immediately I am seated down in front of my PC to blog about them so that I can share with my mommies network on FB group Healthy Food for My Baby. They are gonna love me for sharing this. This is soooo delicious, yet so easy to prepare with just four ingredients! And best of all, it doesn't contain egg! (There are quite a lot of mommies with babies with egg allergies in that group)
 
We're going away for a short trip next week, and I'm trying out a few cookies recipe so that I can bake them and bring them along for our trip. These cookies will be good to keep the lil' fella filled up when we're travelling by plane/ car. I tried buying some of those babies/kids cookies and I really don't like the amount of ingredients used and almost every brand (be it organic or not) contains 'shortening' as their ingredient. I don't mind butter. I don't mind sugar, so long it's not white sugar. But shortening.. arghh.. I just have this 'hatred' towards it. I have tried using it in some of my baking. The way it sticks to my hand and everywhere and the way it is so difficult to wash away .. it scares me. Imagine it being in our body, in our system. The feeling is indescribable. But the sad news is, it's present in almost every baked goods we eat. Bread, cookies, cakes, biscuits ... etc. Guess that's the reason why I started baking bread these days.
 
These cookies uses potato flour, which I assume is the one that gives it the 'melt-in-the-mouth' texture. I tried looking around for potato flour but fail to find it in the local bakery store, so I ordered some from my supplier when I did my monthly ordering for my shop. Even better with organic ones. Instead of using normal white icing sugar, FYI I never bake with white sugar, I uses molasses, if it requires icing sugar, I use the powdered sugar I blitz from molasses (see photo), which explains the reason why these cookies are already fragrant without any flavoring used. Molasses gives the baked goods a nice aroma that's not easily achieved by using white sugar.


Recipe, adapted from here.
I halved the recipe which gave me 28 cookies.
You should bake more, cos I now regret that I've baked so little.

Ingredients
62.5g butter
20g icing sugar, sifted (I used brown molasses sugar, which I blitz till it turns into powder - see photo)**
62.5g potato flour
40g all purpose flour

Method
1. Beat butter and sugar till fluffy.
2. Sift in potato flour and all purpose flour, mix to form a soft dough.
3. Roll into small balls (about 2cm in diameter), arrange on baking tray and press lightly with a fork.
4. Bake in preheated oven at 170 deg C for 15 mins, upper rack (need not bake till cookies turn brown) (I baked these at 165deg C for about 15min in my small scale toaster oven).
 
** I love cooking or baking with molasses, because it's the least processed. It's crude and has darker color compared to brown sugar. It is also much less sweeter compared to brown or white sugar. But some molasses are quite coarse in terms of its texture. So I always blitz them into fine powdery texture.

The molasses sugar I used for baking.
 
I blitz them in a food processor until they turns into this.


The potato flour I used.


Green tea hokkaido chiffon cupcakes

This is my third time making chiffon cupcakes this week. Hahahaaa.. I get this kind of craze. When I'm into making something, I make them day in day out making sure I get them done perfectly. I made some really good pandan chiffon cupcakes using homegrown pandan leaves, but there's only one drawback to the recipe, the top part of the chiffon is ugly. It sank upon cooling. And I've heard from a friend who baked her Hokkaido cupcake using the 'tang mien' method and it is super soft and it doesn't sink. I'm not too sure if it will be any softer than my pandan chiffon recipe (cos I thought that's the best, anything softer than that would be tooo moist), but 'it doesn't sink??' let's find out then. I tried out this recipe by Catherine.

Other than the 'tang mien' method, I also did two other methods which some facebookers from a baking FB group claimed that will help to prevent the cupcakes from sinking, i.e.
  • let the cupcakes sleep on their sides once out of the oven (see photo)
  • baked them with these temperatures for these durations (which doesn't worked very well for my small toaster oven, it was kinda too long which may burn the top and bottom)
100deg C for 10min
130deg C for 20min (I cut to 15min)
150deg C for 15min (1 cut to 10min)
160deg C for 5min (I didn't do this)
 
The sleeping beauties

Wow!! Seriously, it doesn't sink!!


As you can see from the photos, the cupcakes never sank. Hahaaa.. I should be glad, shouldn't I? But the problem now, is that I don't know which one of the three method helped to prevent it from sinking. Arghhh!!
 
But softness wise, this is okay, I still prefer my pandan version. It was much more fragrant and was equally soft, if not softer.

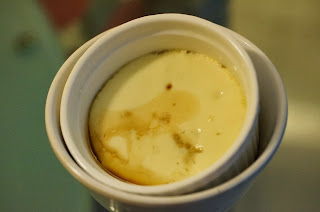
Salmon and cod teriyaki with chawanmushi

The in-laws were out attending a wedding dinner, so it was my turn to make dinner. I prepared something that's fast and easy, cos the lil' fella wasn't felling well and was super cranky and clingy. I had to carry him (with my i-angel babycarrier) while making prep for the din.
 
Made my own teriyaki sauce for the fish and mushroom. Super loved it!! I loved having it made my own, cos I can adjust its sweetness and saltiness, I do find outside ones quite sweet. And it's so easy to prepare using the ingredients commonly found in any kitchen. I don't need to buy a bottle of teriyaki sauce just because I'm cooking Japanese tonight.
 
My sweethearts <3


Hokkaido chiffon cupcakes


Recipe for the teriyaki sauce (adapted from here)
 
  • 4 tbsp. soy sauce (I used Bragg's liquid amino)
  • 4 tbsp. mirin
  • 2 tbsp. plum vinegar (which has sugar added to it, so I omit the sugar in this recipe)  
  • grated ginger and garlic

  •  
  • 1 tbsp. corn flour
  • 3 tbsp. water

  •  
     
    Mix together soy sauce, mirin, vinegar, grated ginger and garlic. Used the sauce to marinade the fish for about an hour. Then pan-fry the fish. Leave the fish aside. Put the sauce into the same fry pan. Heat through and add in corn flour mixed with water. Cook till sauce thickens and pour over fish. I also used the sauce to simmer the enoki mushroom.
     
    Recipe for the chawanmushi (adapted from here)
    (makes 4 serving)
     
    • 3 eggs
    • 300ml water
    • dash of salt and toasted sesame oil
    • about 2tbsp minced pork, seasoned with salt, soy sauce and corn flour
    Instructions:
    1. Gently beat eggs with a pair of chopsticks. Add in water and seasoning. Beat to combine. Strain the egg mixture to remove any egg blobs.
    2. Divide the minced pork among 4 ramekin dish or those Japanese cups (used commonly to prepare chawanmushi).
    3. Pour in the egg-water mixture. Cover with aluminium oil.
    4. Steam for 10min. Place toppings, like enoki or sliced mushroom or ginkgo etc.
    5. Steam for another 7min. Serve.
     
    I also served our main meal with a simple salad served with a homemade Japanese goma dressing.
    For dessert, we had green tea Hokkaido chiffon cupcakes.


    Cashew nut butter (my healthy nutella)

    I've been making crepes for breakfast these days. And because I don't add sugar into my crepes, I gotta have something sweet to go with it. I don't mind something savory with it. But my hubby does. So I am making something sweet for my hubby to have his crepes. I was contemplating a cashew nut or a walnut spread, then I made one combining both.


    This is the best shot I got for my 'nutella' made from roasted cashew nut and walnuts. It's thick and chunky, just the way I like it. It's very moreish due to the creaminess from the nuts.
     
    Here's how I did it, you'll need:
     
    • 1 cup of cashew nuts and walnuts (more cashew than walnuts), soaked in water for at least 2 hrs
    • 1/2 tsp of salt
    • Honey or sugar (to taste)  
    • 2tbsp oil/ butter (I used grapeseed oil) 
    1. Soak nuts in water for at least 2 hours.
    2. Pan fry without oil or dry roast in oven for about 15-25min until nuts turn golden brown (please don't burn them, they will taste bitter).
    3. Blitz in a blender with oil. Add more oil if you want to make it creamy.


    After making the nut butter, I had some leftover in the blender which is hard to be scrapped clean. So I added in milk and water to it and made it nut milk, which I kept to make crepes.

    Roasted cashew nut milk crepe

    After yesterday's crepe, I decided to make crepes for breakfast again. And of course, I never repeat the same stuff. This time, I tried making them using a roasted cashew nut milk which I freshly made. The cashew nut milk is made from roasted cashew and walnuts, and it wasn't sweetened, so it's quite subtle but fragrant from the natural nutty aroma.
     
    Today's crepe looks more like chapatti, due to the color. The recipe was from yesterday's crepe, but I replaced the milk with my homemade nut milk. My filling today was my homemade 'nutella' made from roasted cashew nuts and walnuts drizzled with honey, whereas the lil' fella had his with caramelized banana (which he had share most of his with Pepper, our dog -.-).


    My homemade nutella (roasted cashew and walnut butter)


    Pepper is a beauty. And she's massive.


    Thursday, November 28, 2013

    Crepe for breakfast

    I was watching a Singapore-made cooking show on AFC last night and the host was making crepe, I was waiting till the end of the show for the host to repeat the ingredients and amount used so that I can quickly prepare for tomorrow's breakfast (I started watching it halfway and that the host did mention that the batter should be prepared in advance, and I was waiting for my bread to proof that time, so might as well prepare it). But the host never did repeat the recipe. In the end, I went to bed without preparing in advanced.
     
    The next morning, I woke up when my little one was still sound asleep. Great! I quickly ran downstair, checked with Mr. Google for a recipe on crepe and I opted for my fav chef's Martha's simple crepe recipe and tada!! made them! It was quite a simple one and something different for our breakfast. The little one has gotten quite bored of his breakfast oatmeal lately, so I have to make something more than just steamed oatmeal with fruits.
     
    The little one has his with banana, while I have mine with grated cheddar, roasted sweet potato and mushroom. I also prepared the savory feeling for my hubby's brunch, but he told me that he found it weird eating crepe/pancake with a savory feeling. I guess I'm one of those odd few who finds it okay to have savory filling for crepe/pancake. Or are you one of them too?


    Recipe by Martha Stewart
    I halved her recipe to yield two pieces of crepe (I guess the quantity will depend on your pan size)
     
    • 1/2 cup flour
    • 3/4 cup milk
    • 2 eggs
    • pinch of salt
    • no sugar added
    • 2tbsp butter
    1. Beat together flour, milk, egg, salt, making sure there are no lumps (I sieved the batter).
    2. Leave aside for at least half an hour so that the flour will absorb all the liquid.
    3. Heat up a non-stick frying pan. Melt butter. Add  batter to completely cover pan. Cook until underside of crepe is golden brown. Flip over to the other side and cook till golden brown.
    4. Serve with your desired choice of filling.
     
    When I made these, I thought to myself, 'I think I can make crepe cakes. It shouldn't be difficult making 30 pieces of these crepes and assemble them as cake, right?' Then I thought, '... why would I wanna eat 30 pieces of these crepes with cream??...'....'hm... I doubt I'll make crepe cakes...' 'I will just stick to my crepe as breakfast' ...
     
     
    Check out my other crepe flavors and fillings:
     

    Tuesday, November 26, 2013

    Soy-pandan bread

    I love pandan, especially baked stuffs made from freshly squeezed pandan juice.
     
    From the soy-pandan chiffon cupcakes, I made extra soy-pandan juice so that I can bake bread with them. When these were baking in the oven, my whole house was smelling good, wonder if the scent was gonna chase away cockroach. Back then, my granny used to leave tied up pandan leaves in the cupboard to keep the cockroach at bay (wondering if it was cockroaches or lizards).
     
    I baked these soy-pandan bread using an overnight fermentation method which I learnt from Catherine. It's an interesting one, it saves time and I can have the buns/bread done in shorter time span cos the first proofing was already done the night before. Simply summarized, it has two stages of mixing and kneading. First, the dough was kneaded the day before and left to proof at room temperature for an hour, and then kept in the fridge for at least 12hours. Then, the dough would be mixed and kneaded with a fresh batch of flour and liquid and left to proof for just 15-20min before I can shape and bake! In other words, the bread or buns can be ready in about 1 hour (inclusive of baking time!).
     
    They have rough surface cos I was too lazy to apply egg wash.


    I made two fillings for this soy-pandan bread. One is a sweet one with just dried organic blackcurrant, and the other one is a savory one with pumpkin and chicken curry I quickly prepared when the second stage mixing and kneading was in place (in the bread machine).
     
    *I halved her original recipe
    Sponge dough
    • 120g Soy-pandan milk (from fridge)  
    • 200g Bread flour (stored in freezer for about 45min)
    • 1tbsp molasses sugar (blitz to fine powder)
    • 1/2 tbsp. instant active yeast
    Mix all and knead for about 5-10min. Let proof in room temperature for an hour. Then spread with oil over the surface of the dough and wrap enclosed tightly in a plastic bag, leaving no air for extreme fermentation/proofing. Leave in fridge for at least 12hours.
     
    Main dough
    • 1 egg
    • 1tbsp soy milk (I added this in, cos the dough seems to be a little dry)
    • 100g bread flour
    • 50g all purpose flour
    • 2tbsp soymilk powder
    • 2tbsp molasses sugar (fine)
    • 1tbsp honey
    • pinch of salt
    • 1/2 tbsp. instant active yeast
     
    • 20g butter plus 20g grapeseed oil
    Filling
    • Cooked chicken breast and pumpkin curry (about 1cup which makes 3 bun)
    In a breadmaker,
    1. Place liquid (honey, soy and egg) followed by flour and other dry ingredients, except butter. Combine. Put in the pre-prepared sponge dough pieces by pieces. Let knead for about 10min. Add in butter when all the liquid has been well absorbed by the dough.
    2. Divide dough into your preferred sizing (mine was 110g each). Let proof for 15-20min.
    3. Shape and bake. I bake these at 175deg C for 30min.


    Monday, November 25, 2013

    Very good soy-pandan chiffon cupcake

    I had to title it this way. This is really good. Sometimes I think I get biased when typing while eating the cakes fresh out of the oven. Just like what the owner of this recipe said, once you've tasted pandan chiffon warm, you will never want the cold stuffs you always get anymore. I agree! This recipe is tooo good not to be given credit for. But please be warned, this very delicious tasting chiffon cupcake will crack. It will not give you a very good outlook, but it definitely tastes 100times better than its outlook. When you know how good it tastes, you won't be bothered of its look. I already finished eating one when I'm typing this line. But I cannot have a second one, cos I already had two orange chiffon cupcakes (which I baked yesterday) and I was already way over my quota.
     
    Now, if you're too, like me, contemplating on whether if you should just try out half of this recipe? Please don't. Do the full recipe. I was contemplating, cos I, again, was trying to limit myself from getting sugar overload, but then I thought, it's alright, I can give some to Aunty Helen, my neighbor, whom the homegrown pandan leaves which I used in this recipe belongs to. The pandan plant was growing at the side of the fence parting our house compound, and it just decided to cross over to our place, and I seriously remembered Aunty Helen mentioned that we can use the pandan plant anytime (which my hubby never recalled) ... hmm.. anyway, when I started tearing off the liner of this cupcake, I knew I made the right decision of baking the full recipe. I don't think I will have extra for Aunty Helen anymore (ooppspss... let's hope she never reads my blog, fingers crossed) ;p

    Here's the pandan (screwpine) leaves planted by Aunty Helen


    我很丑。。可是, 我真的很

    柔软。。。 Can you imagine how fluffy it is?
    Here's the recipe (adapted from here)
    This recipe yields 8 cupcakes in those Hokkaido cupcake liners

    • 4 egg yolks
    • 1tbsp molasses castor sugar (which I have blended to a very fine texture using molasses sugar)
    • 50g grapeseed oil
    • 70g green, mature pandan leaves (rinsed thoroughly and drained, then chopped to short sections)
    • 75g fresh soy milk (unsweetened)
    **pandan leaves are blitz with the soy milk, and squeezed through the cheesecloth to obtain about 65g green milk (there were more, I kept them for breadmaking the next day)
    • pinch of salt
    • 80g cake flour (I used top flour)
    • 1/4 tsp baking powder

    • 4 egg white
    • 4 tbsp. molasses castor sugar
    As you can see, I didn't use normal castor sugar, my castor sugar are made from molasses (which was a little too coarse, so I blitz them into fine powder texture). I love cooking and baking with molasses instead of white sugar. Molasses are not that sweet and they are less refined compared to white sugar.

    I have adjusted the amount of sugar in this recipe. I find it just right. I don't like anything too sweet.

    Instructions:
    1. Preheat oven to 165deg C.
    2. Whisk egg whites with pinch of salt till they form soft peak. Gradually add in 4tbsp of molasses while continuing to whisk. Keep whisking till egg whites just reach stiff peak.
    3. In another bowl, whisk egg yolks and 1tbsp molasses till thick. Add in oil and green milk. Whisk till combined. Sieve in cake flour and baking powder. Whist to combine.
    4. Add egg whites to yolk batter in 3 batches. Fold till just evenly mixed.
    5. Divide the batter between 8 cupcake liner. Tap liner gently against worktop to level batter and get rid of air bubbles.
    6. I baked these at 165deg C in my toaster oven for first 10min. Then turn down the temperature to 155deg C and baked for another 10min. Just like the owner of this recipe mentioned, cakes crack after first 10min.
    7. Let cool and serve.
    Note: My pandan chiffon isn't green in color, cos first, I used homemade pandan paste (not the artificial flavoring with coloring), secondly, I used molasses sugar in replacement of white castor sugar.
    Related Posts Plugin for WordPress, Blogger...